Loose And Wrinkled CLS621 Ribbon
This knowledge base article shows you how to correct a loose and wrinkled CLS621 ribbon on your number plate printer. Not only should you do this when you are having print issues. But you need to do this every time you replace a ribbon or load fresh reflective.
A loose and wrinkled CLS621 ribbon will cause lines or banding on your prints. But at least it’s quick and easy to fix, you’ll just need to tweak the knobs on the print unit. As always, to avoid problems ensure the power is off before any maintenance.
Raise Print Unit
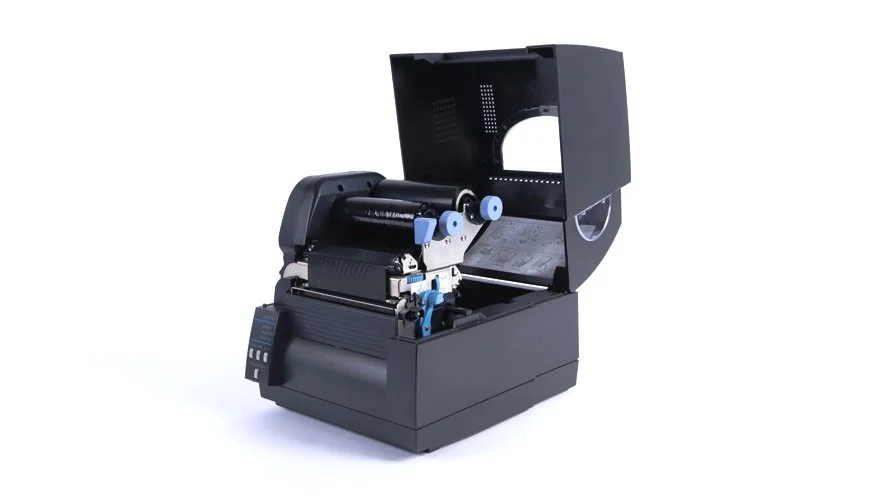
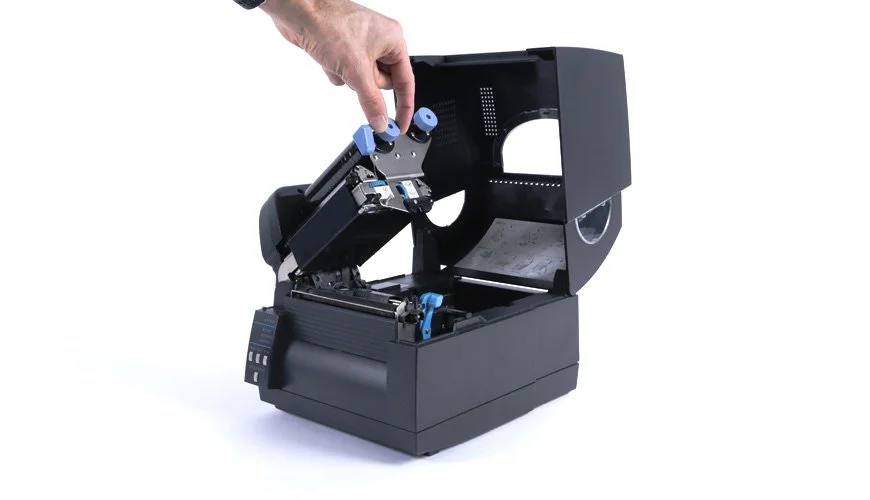
For ease of access and to release any tension, you will need to raise the print unit and ribbon up. To release it, simply push down the large headed blue lever and lift the unit all the way up. There’s no need to lift the sensor or remove your components. Now you are ready to start fixing the ribbon.
Tweak the Ribbon & Winding Cores
The easiest way to get rid of wrinkles is by tweaking the two cores. Start on the winding side and rotate the blue knob backwards and forwards. Simply jiggle it to remove any slack and wrinkles from the exposed ribbon. Repeat with the ribbon side if required until all your wrinkles have gone. If this doesn’t work, you may need to unwind and reattach the winding core.
Check Ribbon Tension & Media Width Controls
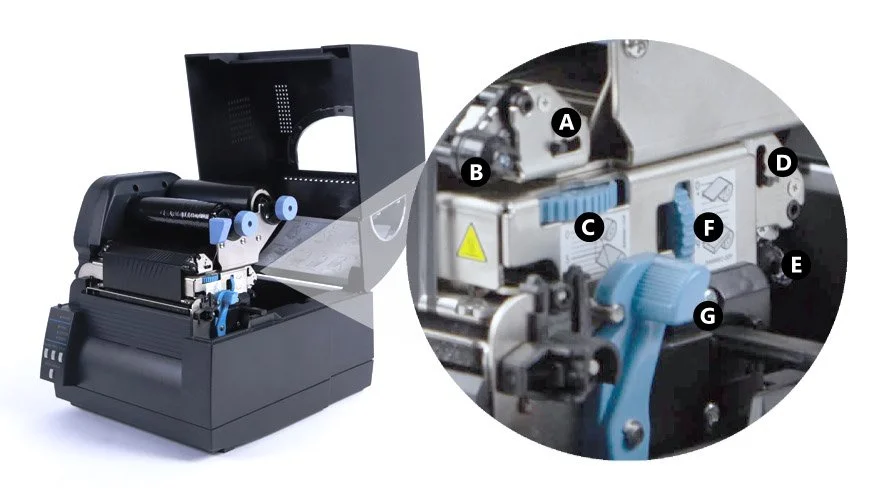
If the wrinkles still do not disappear or it slips when printing, perform ribbon tension adjustment. This is a advanced task which involves setting winding tensions. So check your user guide for instructions or contact our technical support team for help.
- A: Front ribbon tension knob (winding) – Adjust to suit ribbon width and if ribbon is wrinkled or slips.
- B: Front ribbon left-right balance knob (winding) – Set to centre position and adjust if ribbon is wrinkled.
- C: Media width dial – Adjust to suit media width, set to 9 for standard oblong.
- D: Back ribbon tension knob (feeding) – Adjust to suit ribbon width or when ribbon wrinkles or slips.
- E: Back ribbon left-right balance knob (feeding) – Set to centre position and adjust if ribbon is wrinkled.
- F: Media thickness dial – Adjust to suit media thickness, set to 4 for reflective.
- G: Print head lever – Push lever to raise print unit to install media & ribbons.
Lower Print Unit & Position Media
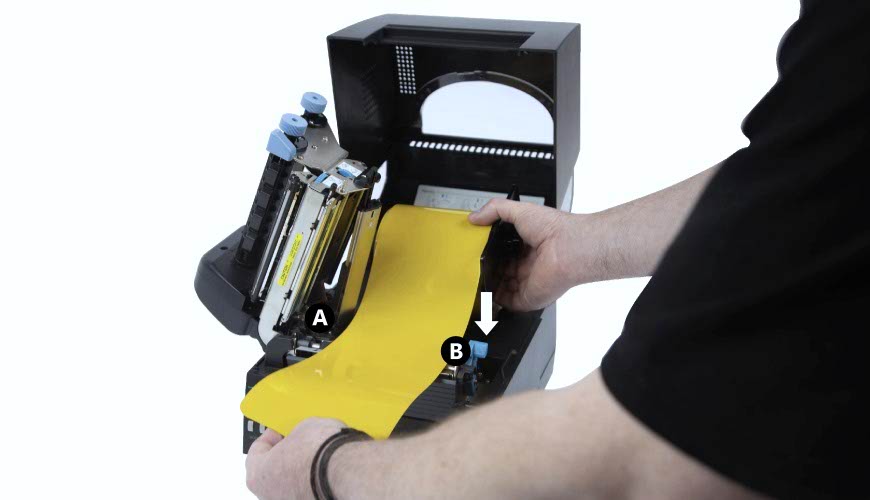
Once you’re happy the ribbon is wrinkle free, you can refit everything and restart production. Check the media guides are in their correct positions, just wide enough for your reflective. Now lower the print unit down, pushing the blue knob to lock it into place.
Turn on your printer and when it’s ready push the feed button on the control panel. This will tighten up the ribbon and printing mechanism. If using rolls, it will also feed a panel through the mechanism until it reaches the next start position. Close the top cover when you’ve done.
Need Help?
This is a quick article on fixing a loose and wrinkled CLS621 ribbon. For further assistance, contact our tech support & customer service team for help. For ribbons, supplies or plate media for your printer, try our online NP-Shop – trade account required.
Note: If your reflective isn’t being pulled through the printer, check the CLS621 Media Tray is seated correctly.


