GoDex Overview
Here’s our GoDex Overview, we use these printers for our Trade Solutions because they provide very reliable reflective number plates. And are capable of printing any number plate size or shape. This page highlights the important parts and locations on the HD830i printer. Refer to this page when troubleshooting or to find out what a part is called or where it’s located.
Front View
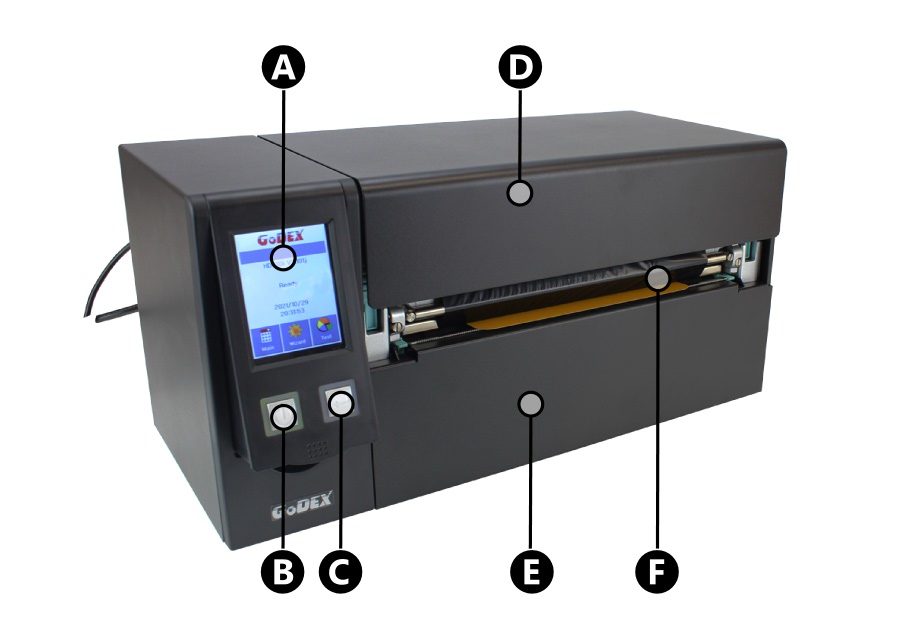
Front view of the GoDex
The front view shows the printers main controls, output and top cover. This is where most of your interaction with the machine occurs.
- A: Control Panel – Touch Screen for Settings.
- B: Power Button – On/Off Key.
- C: Feed Key – Moves Media to the Start Position.
- D: Top Cover – Lift to Access Print Head.
- E: Front Panel – Covers Motor & Working Parts.
- F: Output – Printed Media Output.
Rear View
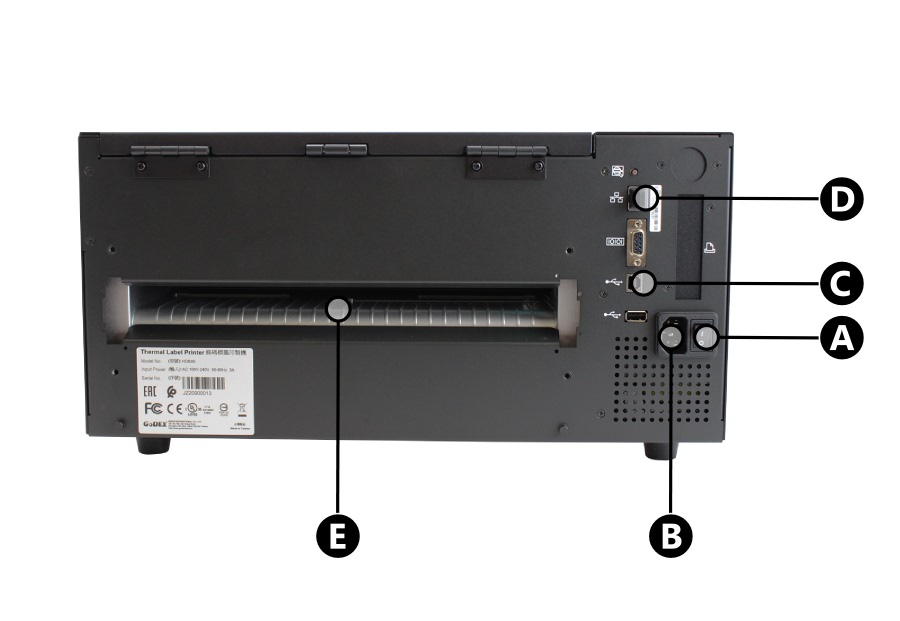
Connect cables and feed media at the rear
The rear view shows the printers mains switch and power points, along with the interface ports. Not to mention the input tray, where you load your components.
- A: Power Switch – Toggles Mains Power On/Off.
- B: Power Socket – Mains Power Cord Socket.
- C: USB Port – Printer USB Socket.
- D: Ethernet Port – LAN Connectivity Socket.
- E: Media Input – For Loading Plate Media.
Inside – Top
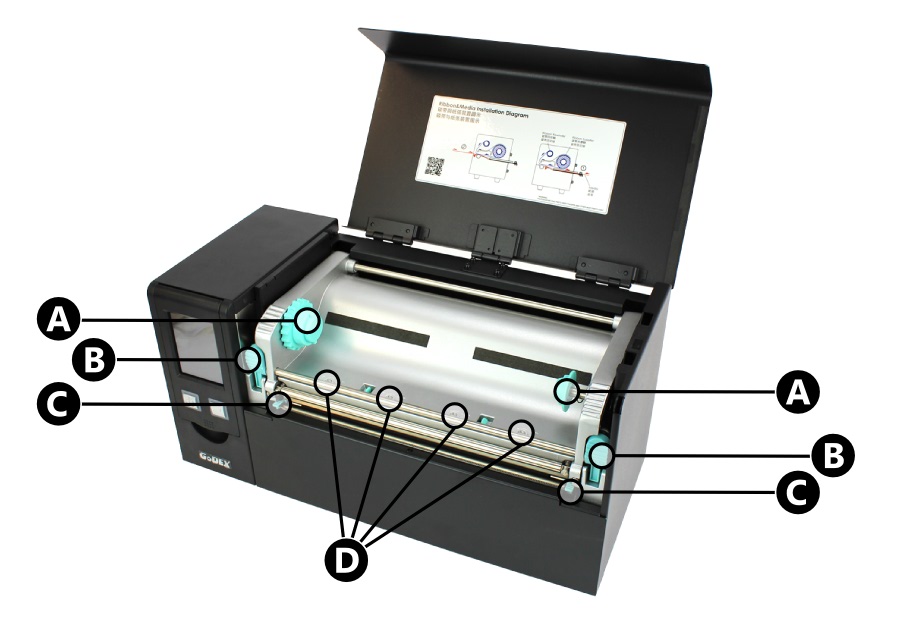
Inside you’ll find the print unit, ribbon and adjustment controls
Lift up the top cover and you’ll find the print head, ribbon holders and media adjustment controls.
- A: Winding Core Holder – Collects your used ribbon.
- B: Print Head Buttons – Press to release the print head.
- C: Media Adjustment Screws – Adjust to suit media thickness.
- D: TPH Adjustment Points – Fine-tune thermal print head pressure.
Inside – Bottom
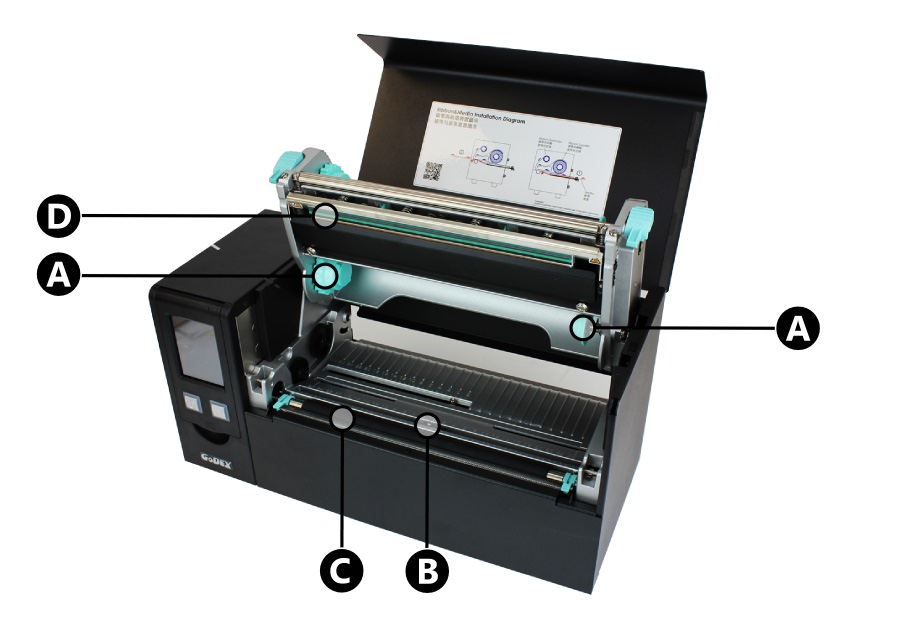
Lift up the print unit to find the print head, sensor and platen roller
Press the print head buttons and lift the unit up to find the thermal print head, ribbon holder and platen.
- A: Ribbon Core Holder – Mount your ribbon core here.
- B: Media Sensor – Detects media start position – movable.
- C: Platen & Roller – Pulls your media through the printer.
- D: Thermal Print Head – Uses heat to apply ink to your media.
Control Panel
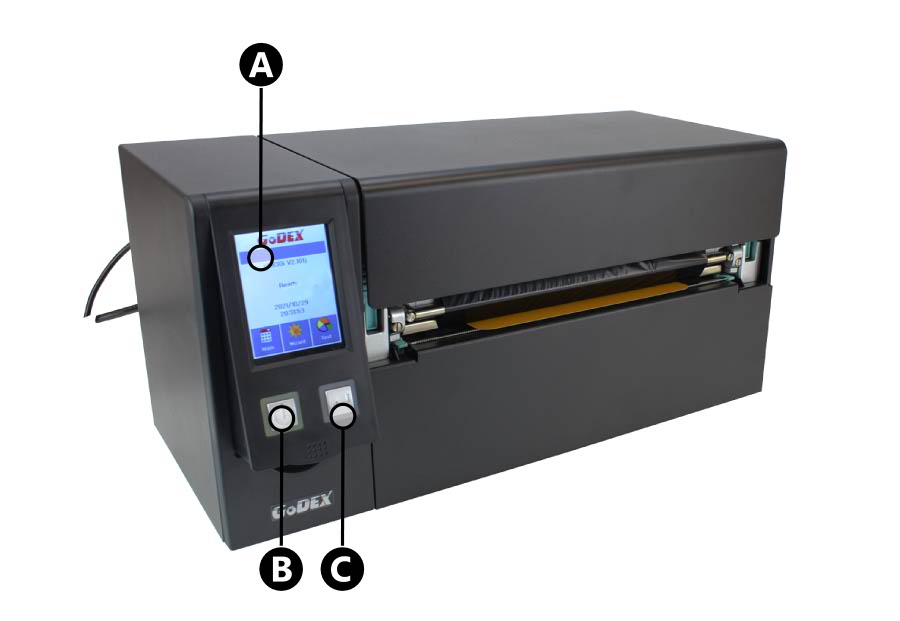
The control panel has a large touch screen
The control panel is where you interact with the printer, with options to begin, pause and stop operations.
- A: Touch screen with advanced settings.
- B: Power/Standby Button – Green when on – hold to put into standby.
- C: Feed/Pause Key – Moves/Pauses media feed – hold to cancel printing.
In brief, using the control panel is easy with most actions concerning the buttons. Because we have already configured the printers language, speed and set-up. So all you need to do is start print jobs and move media into place.
The power button is used to quickly turn your printer on or off. Holding the power button for 3 seconds will put it into standby mode. Next up is the feed key which is used to move your components to the ready position. This is already set by us, and positions your media ready for printing. Pressing feed again will pause or restart printing. If you hold down the feed key for 3 seconds, it will cancel the current print job.
This is a basic overview of the GoDex HD830i Number Plate Printer. Please refer to your user or manufacturers guide for more up-to-date information. Our knowledge base contains articles with details on replacing this printers ribbon and loading media. Not to mention its required operating conditions and approved printer settings. And has solutions to common number plate print issues and printer errors.