This article shows you how to clear your 9541 Media Jams with simple to follow instructions. When it detects a jam, your printers display screen will display a error message indicating what type of jam you have and where. If you’re unsure how to fix the issue press the help button, lit up red, and use the guide provided by the printer. While your printer will refer to a paper jam, it’s a generic term that covers our plate media too.
Before you start trouble shooting jams, give your printer time to cool down and take care handling its parts. Instructions that follow assume you are directly facing the front of the machine.
Media Tray Jam
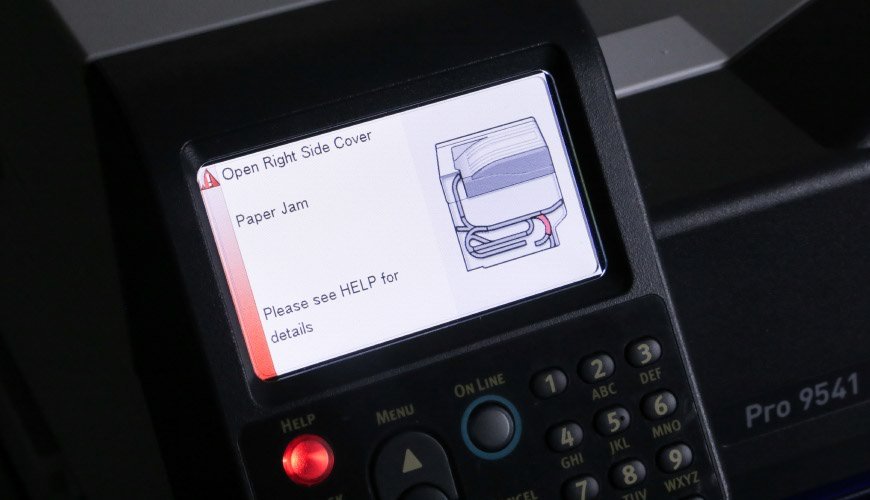
Follow the display guides to clear jams
Component jams located in the Multipurpose tray will result in a error message being displayed on your printers display. The error prompt will point to the right side cover having a paper jam. Ensure you remove any loaded components from your Media Tray before starting to troubleshoot.
Release Feed Tray
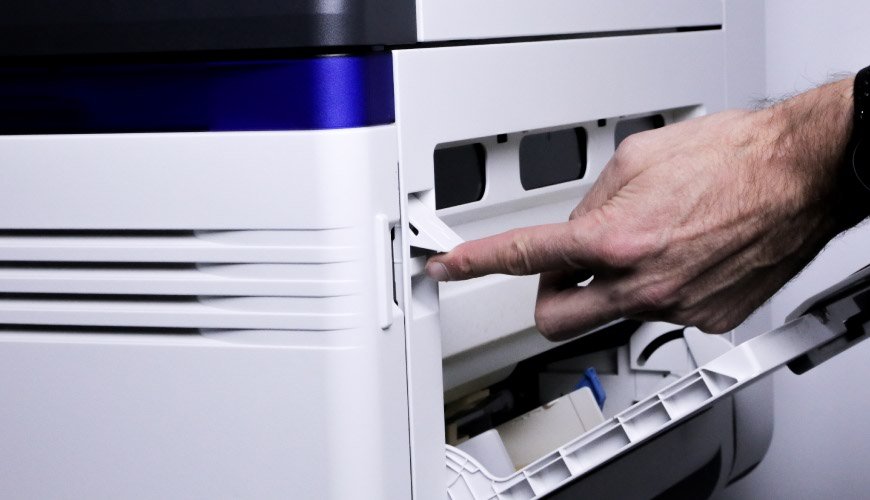
You’ll need to open the tray to clear a feed jam
To get at this jam you’ll have to remove the additional tray from the printer. Simply lift the cage up off the hook points and place it aside. Next lift up the tab indicated in the image above, to fully open up the right side. The feed unit will now hinge down for easier access.
Clear Feed Jam
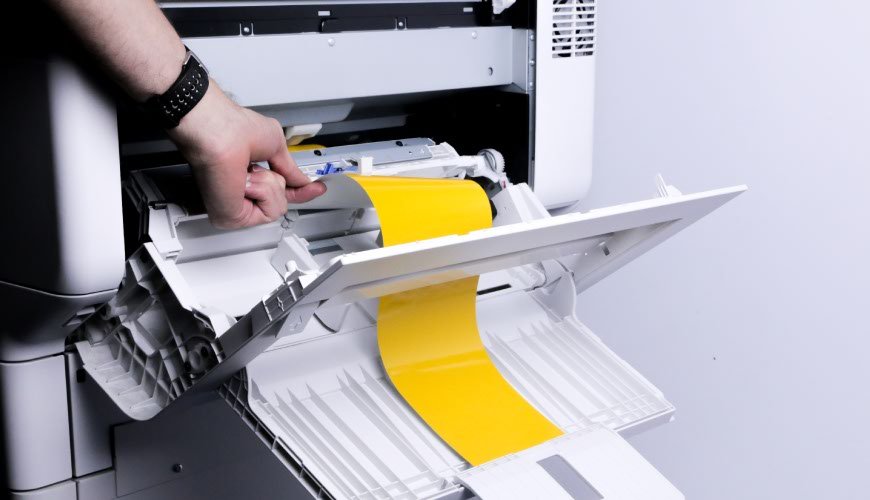
Pull jams towards you and out of the tray
Locate the jammed component and pull it free. Pull the media out of the feed tray towards you and away from the printer. Once the jam is clear, fully close up the media feed unit so it clicks into place. Then refit the media tray and load up your components so you’re ready for production.
Fuser Unit Jam
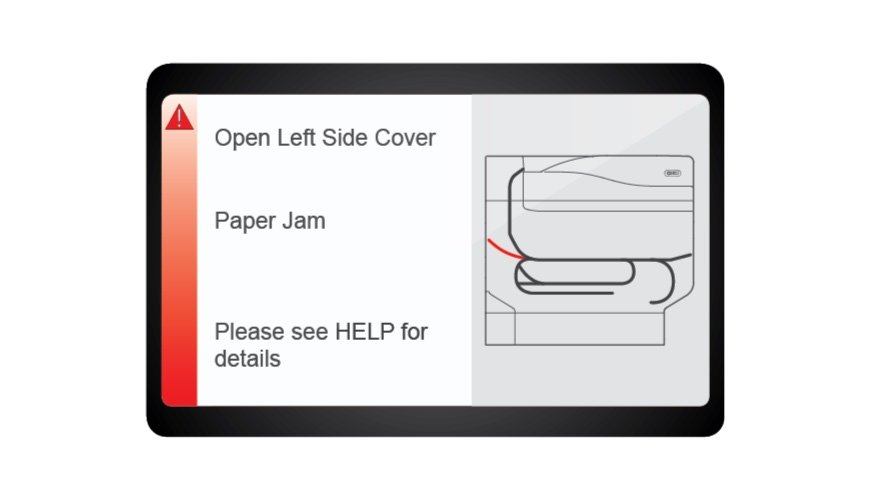
The red line indicates where the jam is
Jams located in the Fuser unit will result in an error message being displayed on the control panel display. The error prompt will point to the left side cover having a paper jam. To clear this jam you’ll have to remove the unit from the left side of the printer. And then pull your media clear from the fuser before replacing it
Open Left Drawer
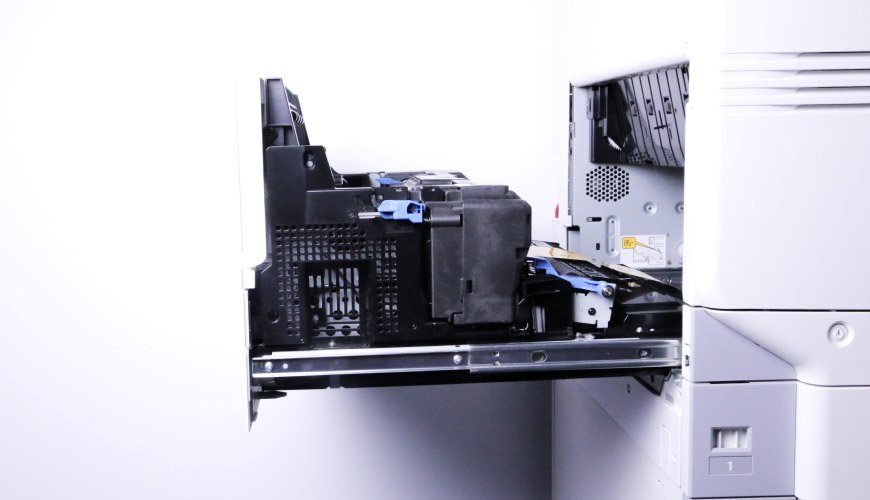
Fusers can be found in the left hand side of the printer
Using the handle, pull the entire left drawer fully open, revealing are the fuser, exit and transfer roller units. The printer uses the fuser to bond toner to your components surface. It does this using heat, so beware the unit may still be hot if recently used.
Remove Fuser
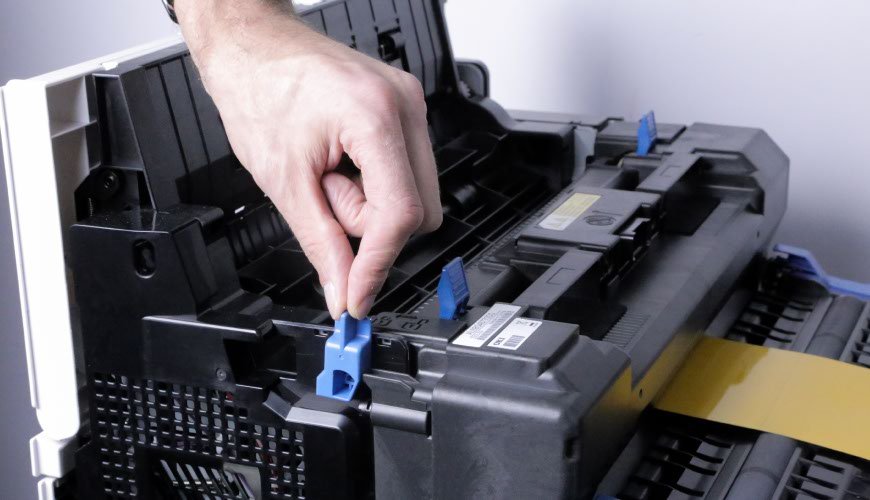
If your media won’t pull free, take the fuser out
To release the fuser, flip the retaining blue clips on the unit. There are two blue clips on the top and two on the side, simply lift these to the up position. Once released, use the provided top handle and lift out the unit and place it on a clean surface.
Clear Fuser Jam
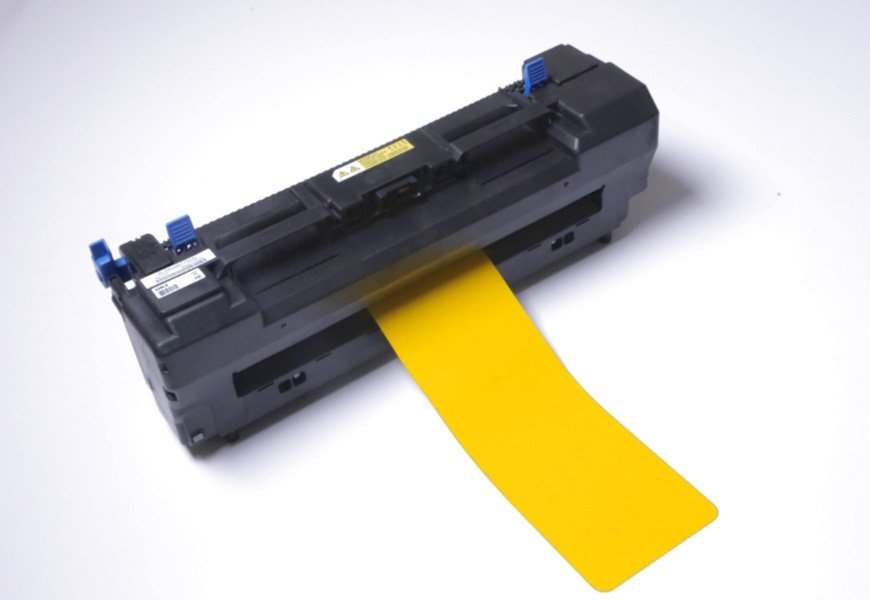
Raise the 2 clips and pull the jam free
With the two top blue clips on the fuser unit being raised up, any jammed media component should simply pull free. Take hold of the longest part of the component showing and pull it free. Now replace the fuser into its slot, and lock it into position by switching down the blue clips and close the left drawer.
Need Help?
For more detailed instructions, try your printers onscreen help. Or if you need further assistance with 9541 Media Jams contact our customer service team for help.