9541 Overview
Here’s the 9541 Overview, we use these led printers for our Pro Series because they make colour number plates of every size and shape. And when we say colour, we mean any colour including white even on yellow reflective. This page highlights the important parts and locations on the OKI printer. Refer to this page when troubleshooting or to find out what a part is called.
9541 Pro Film Printer
 9451 Pro Film- YouTube Popup
Front & Right Side
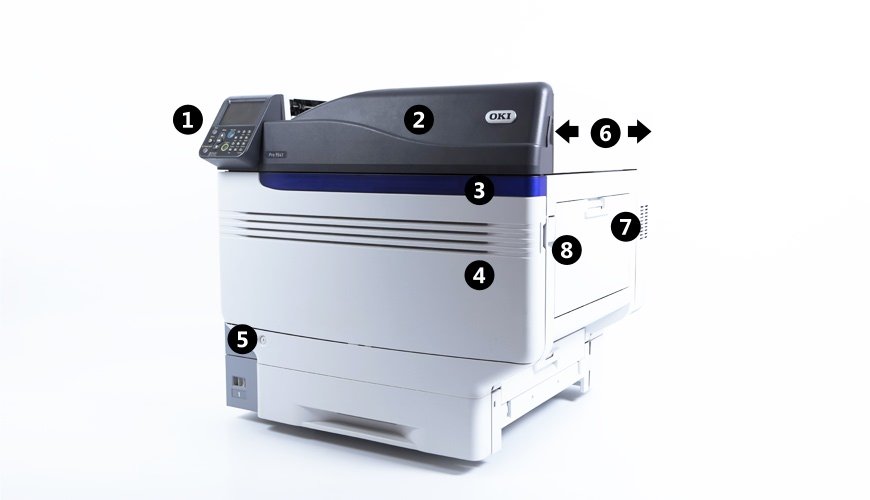
Front and side of the 9541
The section below shows the front and right side of your number plate printer. This is where most of your interaction with the printer occurs.
- 1: Control Panel – Printer menu and status display.
- 2: Top Toner Cover – Lifts up to reveal toner cartridges.
- 3: Front Lamp – Lights up to indicate printer status.
- 4: Front Cover – Opens down to reveal printer interior.
- 5: Power Button – Press to turn printer on or off.
- 6: Mounting Points – Media tray mounting points.
- 7: Multipurpose Tray – Input point for number plate components.
- 8: Opener Tab – Fully opens up the side input drawer.
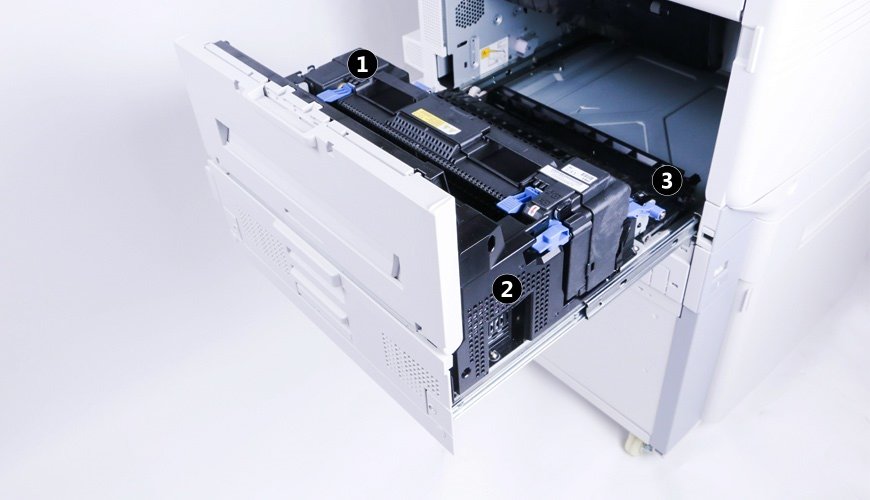
Front Interior
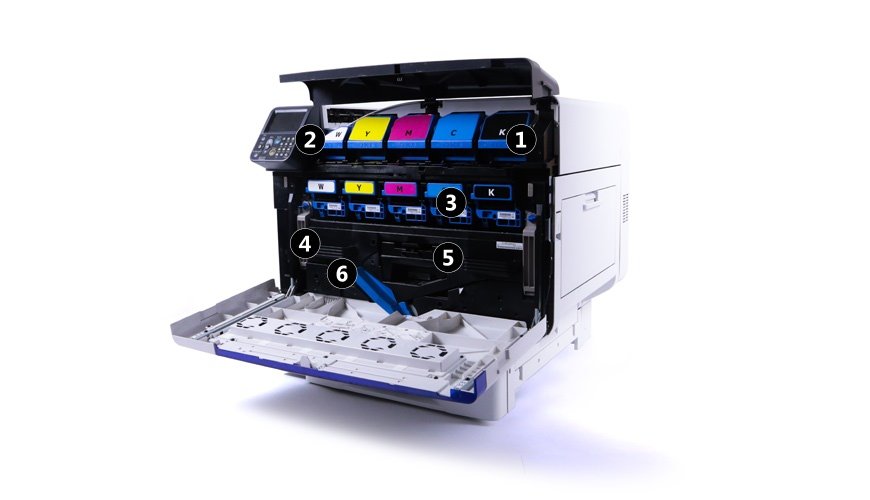
You’ll find the toners and drums under the front covers
Inside the front covers you find the toners and underneath them your drums and belt unit. You replace all of these consumables once they reach their end of life.
- 1: Toner Cartridges – CYMK cartridges.
- 2: Spot Toner – White or clear spot colour cartridge.
- 3: Drum Units – CMYK + Spot colour drum units.
- 4: Belt Unit – Copies toner to a component when printing.
- 5: Waste Toner Box – Collects used toner for disposal.
- 6: Belt Unit Lock Lever – Releases the belt unit when replacing it.
Multipurpose Tray
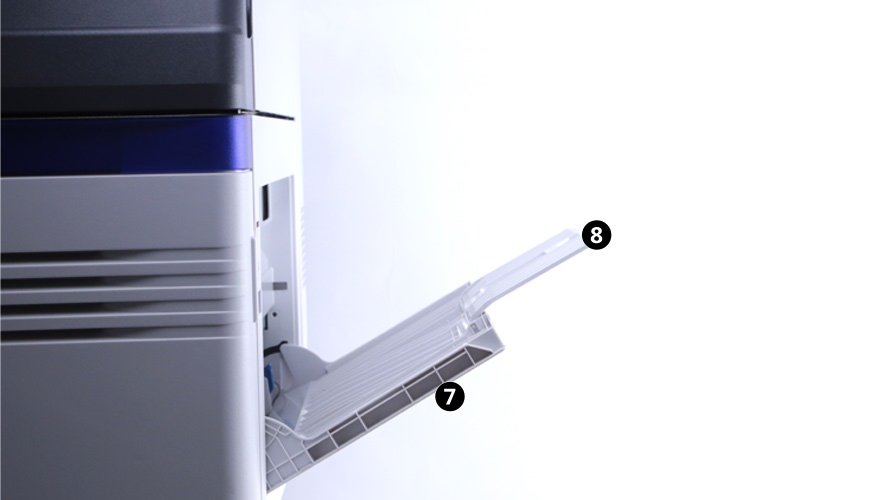
Side tray supports with the media frame
Install your media tray here and load your components for printing number plates. Since the supporters angle upwards, gravity helps feed your media for printing.
- 7: Auxiliary Supporter – Holds media ready, the angle helps feed components into the roller.
- 8: Paper Supporter – Extends the support area for longer sheets of media.
Back & Left Side
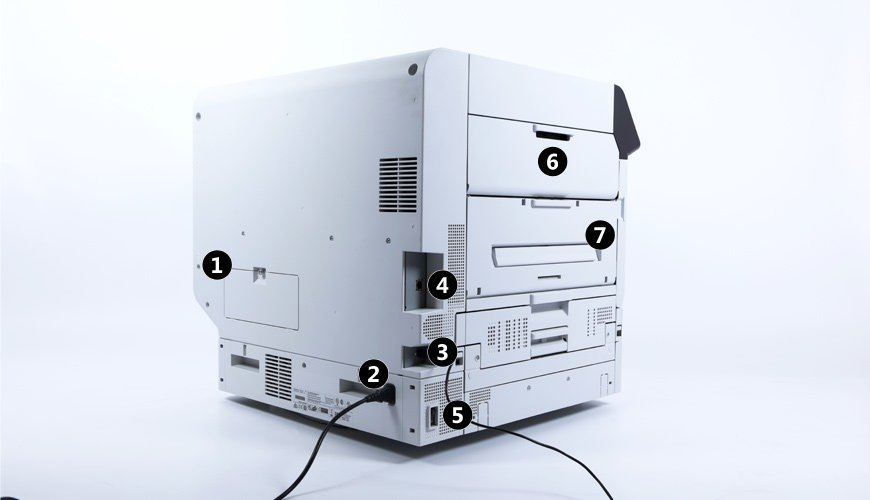
Rear and sign of the Pro printer
On the back you will find the main power and interface ports. While the left contains the printing units and alternate output tray.
- 1: HDD Access – Disc drive bay.
- 2: Power Socket – Mains power inlet.
- 3: USB Interface – USB connectivity port.
- 4: LAN Interface – Ethernet connectivity port.
- 5: Power Switch – Mains power toggle.
- 6: Left Side Cover – Drawer holding the printing units.
- 7: Side Output – Printed components emerge here.
Left Side Interior
On the left hand side is the fuser and duplex unit
If you pull out the left side covers drawer, you’ll find the fuser and duplex units. Which are where you designs are transferred onto your components.
- 1: Fuser Unit – Bonds toner onto a component using heat.
- 2: Duplex Unit – Used when printing on both sides of a sheet.
- 3: Transfer Roller Unit – Transfers toner across onto a component.
Left Side Output
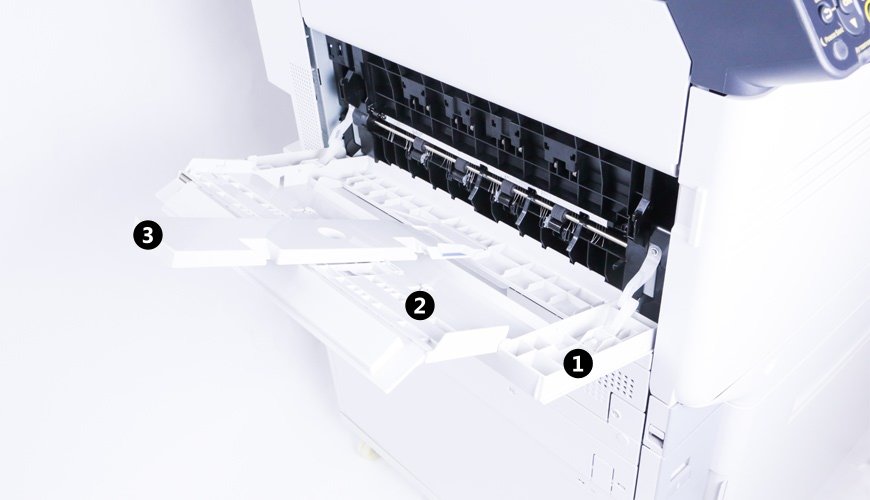
Prints emerge from the top or the left output trays
The left side output is where your face-up prints emerge onto the stacker and supporter.
- 1: Face Up Stacker – Printed sheets emerge here, printed side up.
- 2: Auxiliary Supporter – Holds printed media for collection.
- 3: Paper Supporter – Extends the support area for components.
Printer Top
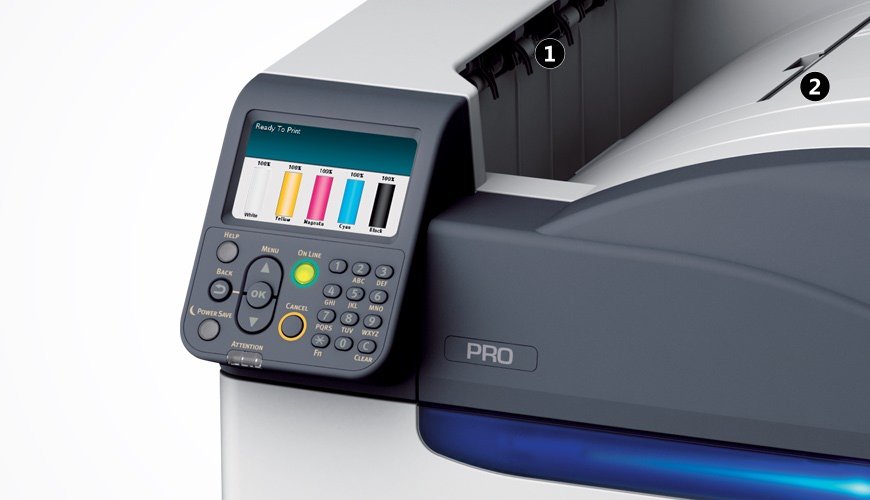
Close-up view showing the control panel and output tray
On top of the printer you will find the main output tray, this is where most prints emerge. Not to mention the location for the printers spot colour, used either for white or clear gloss toner.
- 1: Top Output – Exit point for printed media components.
- 2: Spot Colour Panel – Provides access to the spot colour unit.
Need Help?
This is a basic overview of the OKI 9541 Number Plate Printer. Please refer to your user guide for more up-to-date information. As part of your supply agreement with us, you can order replacement consumables on demand – lead times apply.
Our knowledge base contains articles with details on replacing this printers toners, drums and clearing simple media jams. Not to mention how to load our plate media and its approved printer settings. And has solutions to common number plate print issues and printer errors.