Connect C532 to PC
This article shows how to Connect the C532 to your PC or laptop and turn it on. Simply follow this guide and ensure the power is turned off on both your printer and computer. Before powering on, ensure your work area meets our recommended operational conditions for printing number plates. And extra setup is required when connecting to your network for the first time or via LAN.
Connect Mains Power
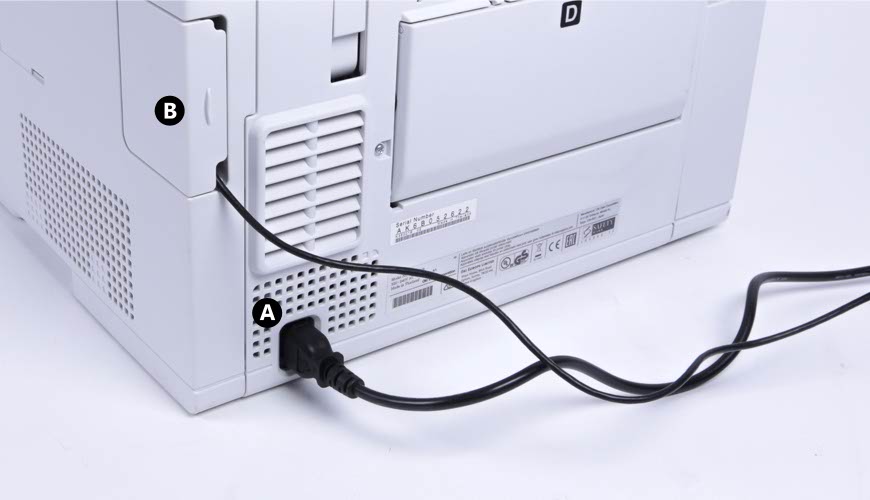
Connect the power to port A & USB underneath B
Check the mains power switch is turned off and the connect the power cord to the rear of the printer (A), then put the plug into a mains socket. Next connect the printer to your PC, the interface ports for USB and Ethernet cables can be found under the corner cover (B) just above the power socket.
Connect to PC
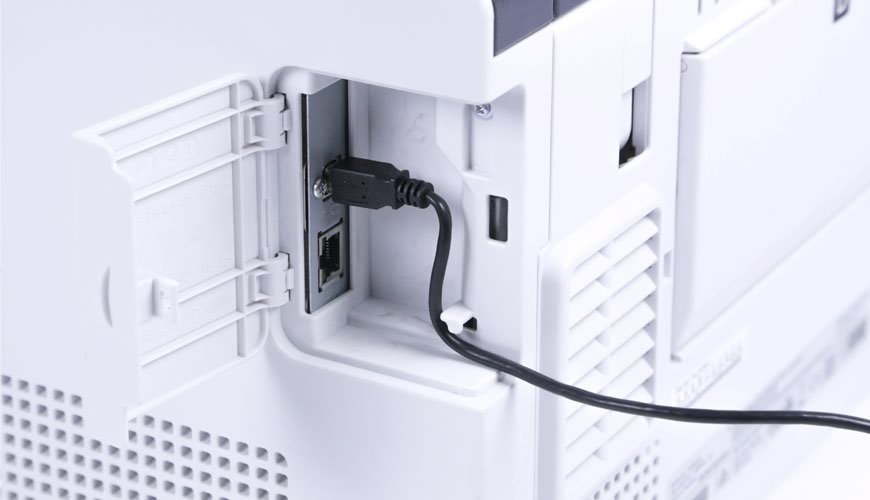
Insert your USB cable into the top port
We recommend using USB to connect your C532 to a PC. As a result, we set up our number plate systems this way by default. Just insert your USB cable into the matching top port at the back of the printer. The cable has two ends, but only one will fit into the back of the printer. The other end of the cable, will need inserting into a spare USB port on your computer.
If using Ethernet to connect to and share the printer over a network, simply align the head of the cable with the notch on the bottom port. Repeat with the other end of the cable for your computer or network.
Power Up Printer & PC
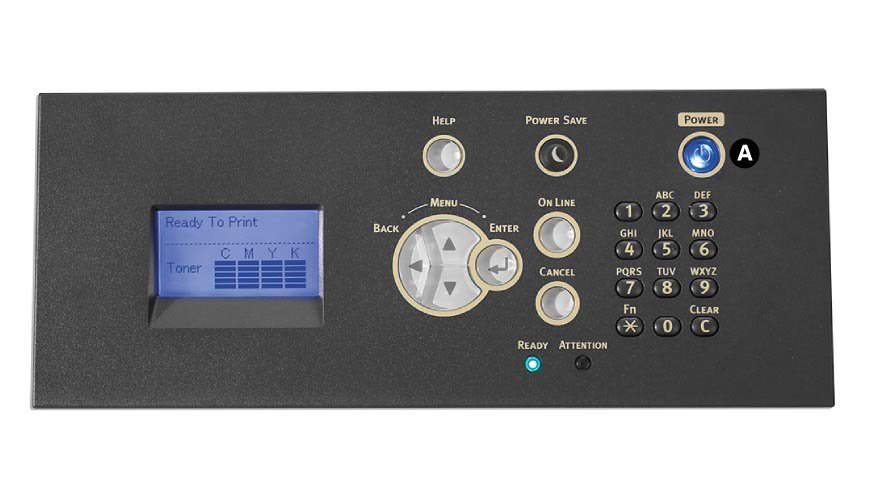
Turn on your C532 using the power button A
Once you’re happy the cables are all securely connected, turn on the mains power first. Next press the printers power button (A) on the control panel for a second to start it, then turn your PC on. The printers ready led will light up green once the printer has started up and is ready for use. If you have used an Ethernet cable to connect the printer to your network, it will need configuring and setting up.
Open up the multipurpose tray and load your plate components when your ready to print.