This knowledge base article is all about our Film Number Plates. Otherwise known as 2-Part Film after its components and the printed media. Below is an overview of its specification, sections on its components, printed media, assembly & recyclability.
Film Number Plates / 2-Part Film
Our Film Number Plates – 2-Part Construction
Overview
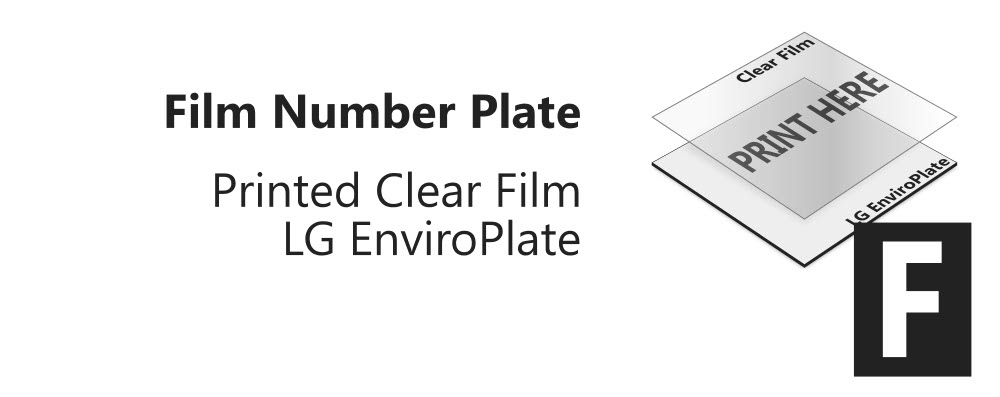
To produce a Film Number Plate you laminate a printed Clear Film sheet above a rigid LG EnviroPlate backing. We consider our Enviro-Plate construction to be most business-friendly number plate in the industry. For it’s eco-friendly, being both recyclable and made using 90% recycled ABS, cutting its carbon footprint by 83%. And it’s efficient because using printed film can reduce annual number plate expenditure significantly.
Film Number Plates are covered by our BSAU 145e Certification. So we can guarantee number plates made from this specification will be road legal, subject to correct use & assembly.
Our Components
Tennants Film Number Plate specification requires reverse printed clear film be mounted above a reflective faced backing plate.
Clear Film

Printed Clear Film On A Jig
Our Clear Film is 0.2mm thick polyester sheet that delivers exceptional optical clarity. Designed to be durable with a high-tensile strength, it’s UV stable for colour fastness. Plus it has an ink receptive coating for for better toner bonding, so either side is printable. All these features combine to make it an ideal print media that passes all durability & visibility testing.
LG EnviroPlate
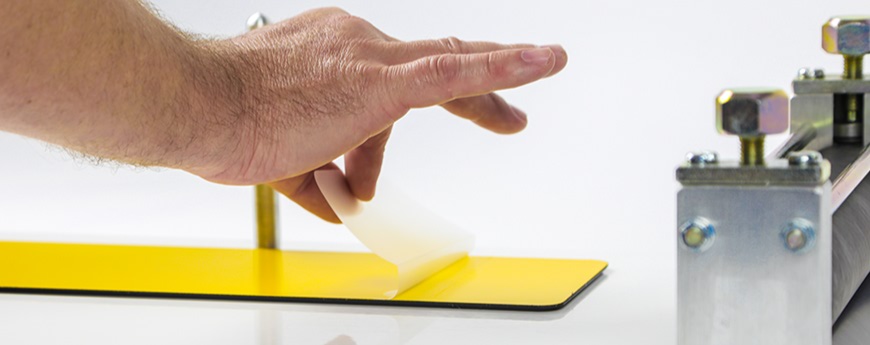
Folding Back the Cover on a EnviroPlate
LG EnviroPlate is fabricated by mounting Oralite Reflective onto a 90% recycled ABS panel. Oralite is perfect for the reflective face, being retroreflective, UV stable & fade resistant. This ensures the legally required colour and reflectivity levels are met for a number plates entire lifecycle. By using recycled ABS panels, it has a much lower carbon footprint than virgin plastic or recycled aluminium. Enviroplate is finished with a high-tack adhesive coating protected by a quick release cover.
Printed Media
Printing onto Clear Film allows suppliers to produce cost-efficient number plates. Since film is just a fraction of the cost of high-performance reflective panels. Basic colour elements can be used if colour correction issues on yellow plates are addressed.
Reverse printing is used to protect designs from the elements & to comply with durability standards. This means our Plates Software mirrors the plate design, printing it out in reverse. So when it’s laminated to the backing plate, it’s sandwiched between the 2 components.
Plate Assembly
Here’s a quick step-by-step guide on how to assemble a number plate. Film Number plates are made by laminating printed film onto a reflective panel. This simple process enables suppliers to produce number plates on-demand. Using on-site systems comprised of specialist printer, plates software and blank components.
When assembling a printed number plate, we recommend using a jig and roller for a professional finish. The jigs pins are used to line up media accurately & consistently. And the rollers apply equal pressure across the entire width, helping the adhesive to bond evenly.
- If needed, apply a Badge Panel to your Clear Film for colour correction.
- Simply peel off its adhesive cover and stick it under your side badge.
- Now use the pins and place your rigid LG EnviroPlate, face up on to the jig.
- Fold back a few centimetres of the adhesive cover at the end of the plate.
- Next, line up your Clear Film sheet on top, with the printed side facing downwards.
- Carefully join the components together at the Exposed Adhesive edge.
- Ensure all the sides are correctly lined up before you press it together.
- Now slide the two parts towards the Rollers at the end of the jig.
- Slowly Wind the arm so it’s fed through, keep the film tight & gently pull the folded cover.
- This will remove the remaining adhesive cover and bond the two parts together.
Recycling
Film Number Plates utilise ABS which is considered a safe plastic, as it’s non-toxic & biocompatible. There are no known adverse effects reported as a result of exposure to the material. ABS is valued & used across many sectors, from medical to automotive, for its durability and versatility. Not only is ABS built to last, with its sturdy structure, but it’s recyclable too.
At the end of life ABS can be processed and ground down into pellets for reuse. As a thermoplastic, the pellets are heated, turned into a liquid & formed into sheets or remoulded. To help sustainability and increase ABS recycling rates we offer a Recycling Service to eligible number plate partners.