This article provides a simple Number Plate Drilling Guide for car dealerships, number plate suppliers and their customers. Follow this guide and you’ll avoid cracking or delaminating your replacement number plates, when you drill new holes.
Remove Existing Number Plate
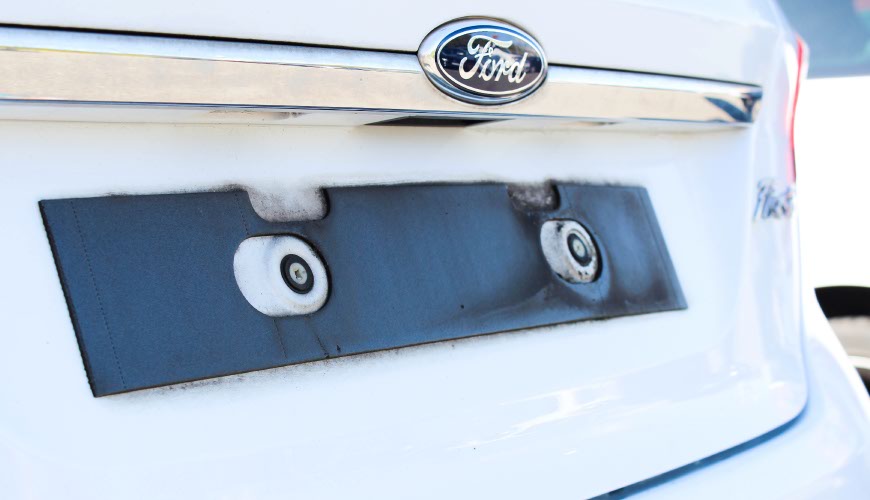
Vehicle with number plate taken off
Before you can fit a replacement number plate, you will need to remove the existing one. Simply unscrew the holding screws and remove the old plate. Keep your old number plate handy, you’ll need it later as a guide. As can be seen in the image above, the area under the number plate will be dirty. So now is a perfect time for a real clean & degrease.
Note: As you can see above, older mounts may not suit BSAU145e rules regarding fixings & the Registration. In this case adhesive pads are recommended instead of screws.
Number Plate Drilling Guide
Fitting your number plates using screws is an easy process with a few simple steps. First you’ll need to make a template to ensure the holes are in the right place. And you’ll want to avoid cracking your new plates when you drill them. Simply follow the steps below and you’ll soon be screwing the plate to your car.
Ordinarily this guide is suitable for both our Reflective & Film number plates. Since our 3-Part plates also have an acrylic face, we suggest using the reflective drilling guide for them.
Note: To find out what type of plate you have, look at it sideways. If it has a 3mm clear top you have a reflective or 3-part plate. On the other hand, film plates have 3mm black ABS on the bottom.
Make a Drilling Template
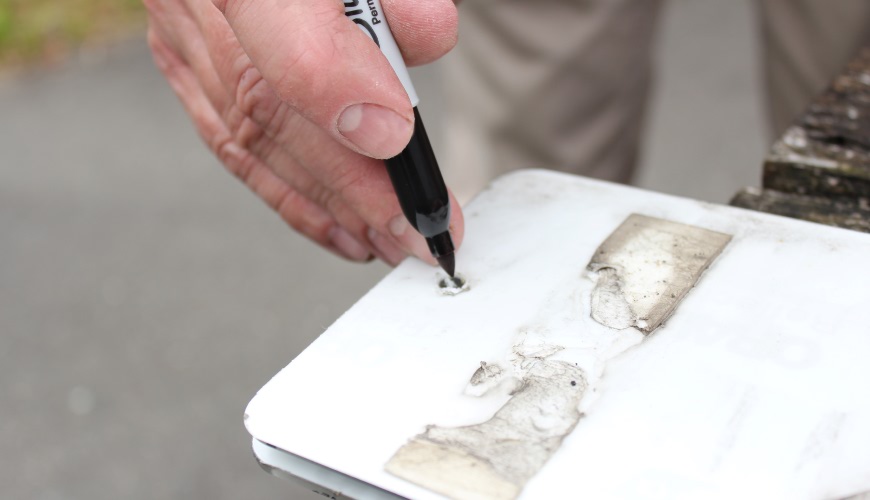
Mark your drilling points on your new number plate
Before you starting drilling, your first step should be to mark where the holes need to be. This is where your old number plate comes in handy as a template. If it’s not suitable, use a large piece of paper for your template and mark the drilling points onto that instead. Push your pen/pencil through the paper and make a hole.
Film Number Plates
For film number plates you need to drill from the Front of the plate. So put your number plate with it registration face up and line up your template on top.
Reflective Number Plates
Alternately, if you’re got a Reflective or 3-Part plate with a 3mm clear face you drill from the Rear. Here you put your number plate registration face down with the template on top.
Next, using a black marker and your template, make a mark or cross on the new plate.
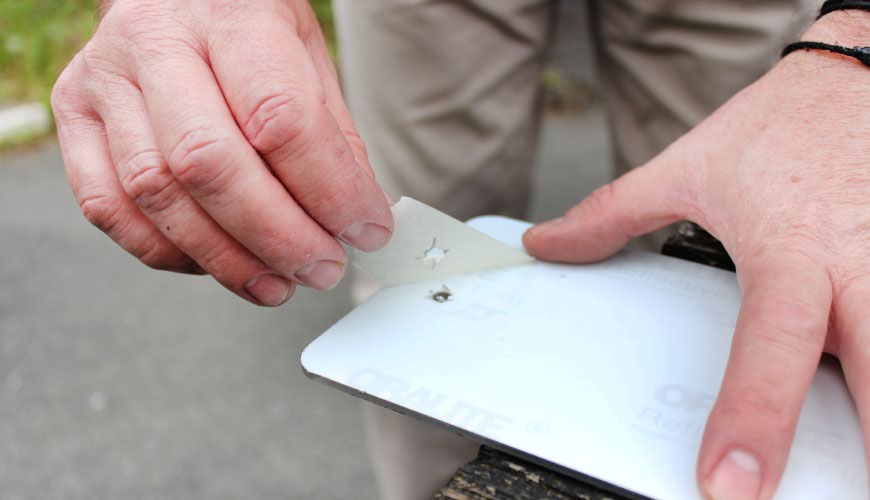
Mask Your Drilling Points
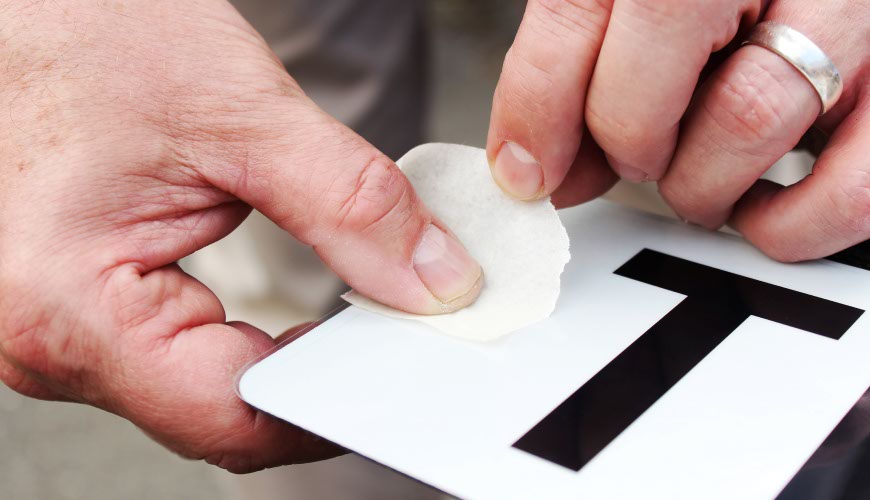
Put Masking Tape On the Drilling Points
When drilling a hole, you only get one chance to get it right. So we’re going to use a common technique of using masking tape to help stop the drill slipping. Apply a small piece of masking tape on top of your drilling marks. Masking tape is thin enough, so you should still be able to see your mark through it. If your marks aren’t visible, re-use your template and mark the drilling points on top of the tape.
Drill the Holes Carefully
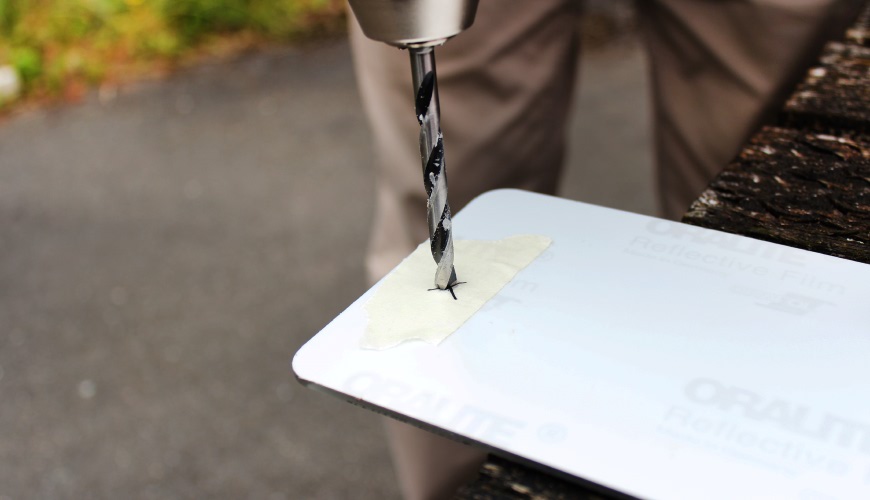
Drill Carefully Through your Number Plate
Use a 6mm diameter acrylic bit for drilling your holes. Carefully position the drill at one of your drilling points. Start the drill and gently begin to make a hole. Allow the bit to do the work, avoid applying to much pressure.
Remember to drill from the correct side of your number plate. Film & ABS are drilled from the front, & Reflective or 3-Part from the rear. Placing a piece of wood underneath the number plate can help to avoid damage.
Deburr & Smooth Holes
Remove Tape and Deburr the Holes
Once you have drilled your holes remove the masking tape from the plate. If there’s any burrs or lumps, take them off. This will help your screws fit flush with the plates surface. Now you’re ready to fit the plate to your vehicle.
Screw Number Plate to Vehicle
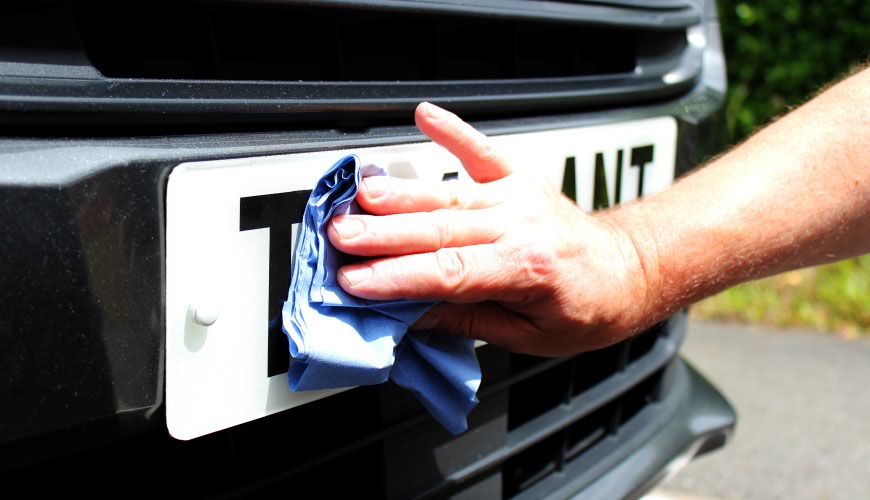
Screw Number Plate into Place and Wipe Clean
Position the plate in the correct location on the vehicle by partially attaching screws to both holes. Now carefully tighten up your fixings, ensure you don’t over tighten them. Finally polish the plate using circular motions with a soft cloth to remove finger prints or dirt.
Remember: Select coloured screw caps that correspond with the holes location on the number plate. Don’t use cap colours which alter the appearance of the registration mark.