Alongside adding text and images, you will need to know how to add coach lines using LG Signs. This knowledge base article provides a simple guide on how to do this. To design a sign or showroom plate, just make your way through each tab. Set up and style each element before you save it as a template or print it out.
The Builder Tabs – Coach
If it’s not already running, start up your LG Signs software and select the Coach tab on the builder. Now you’re ready to start adding coach lines and boxes into your sign.

Use the Coach Tab to insert a border or box
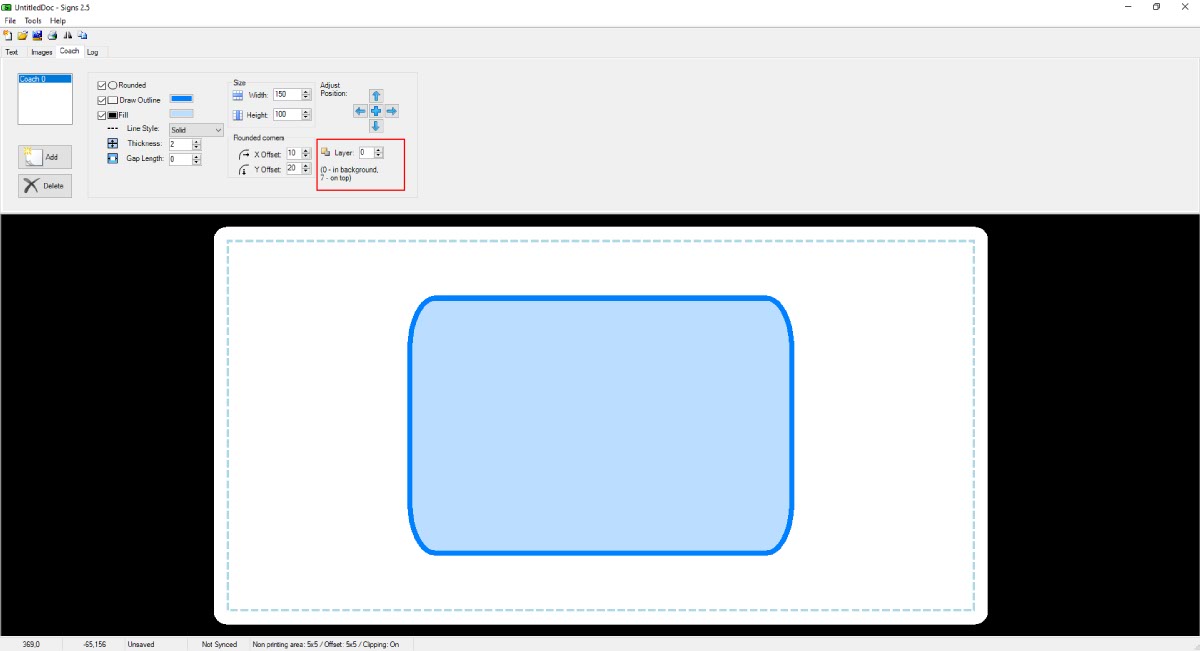
As can be seen on the picture above, the Coach options and controls are spit into multiple sections. Which allow you to insert a coach line and style it as you see fit. And with its controls you can resize and position each one separately.
- 1: List of Current Coach Lines.
- 2: Controls to Add or Delete Coach Lines.
- 3: Options to Turn On & Style Elements.
- 4: Width and Height Settings.
- 5: Fine Tuning Controls.
- 6: Round Corner Radius Options.
- 7: Coach Line Layer
Add A Coach Line
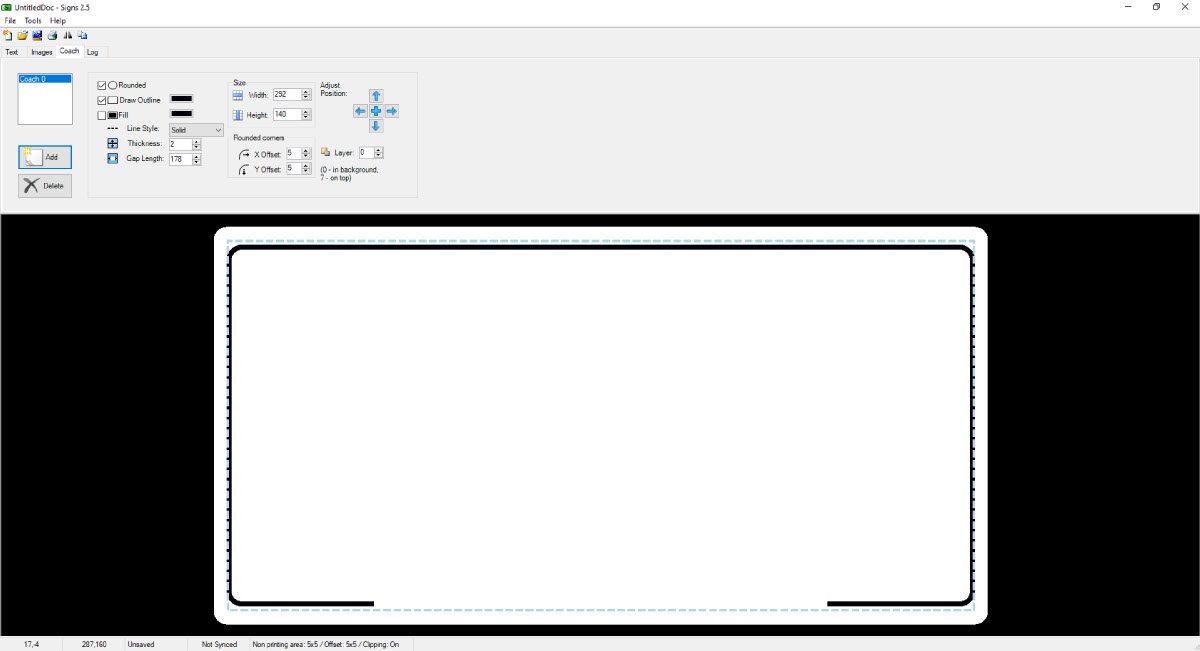
Add a Coach to begin
Once you have selected your signs size, you can begin to add elements into it. In short this section allows you to add a number plate coach line into your design. Moreover, you can then turn it into a joined up border or box. And it’s options are all you need to build a simple sign out of a few design elements.
To add a coach line simply click the ADD Button as shown on the picture above. This will insert one into your sign named Coach 0, complete with default number plate styles. Which means it comes with a bottom gap and is sized to match your sign. You can see this shown in your software’s real time preview window.
Next we will cover the various options and controls to size, position and style your coach line.
Coach Options & Controls
Now style the layer to turn it into whatever you want
Unless you are designing a showroom sign, you will want to resize and style the coach line. Here highlighted on the image above, you can see a raft of options and controls. As a result you can change its corners, add an outline or background colour and alter its size or position. In addition to styling, you can also control its layering as well.
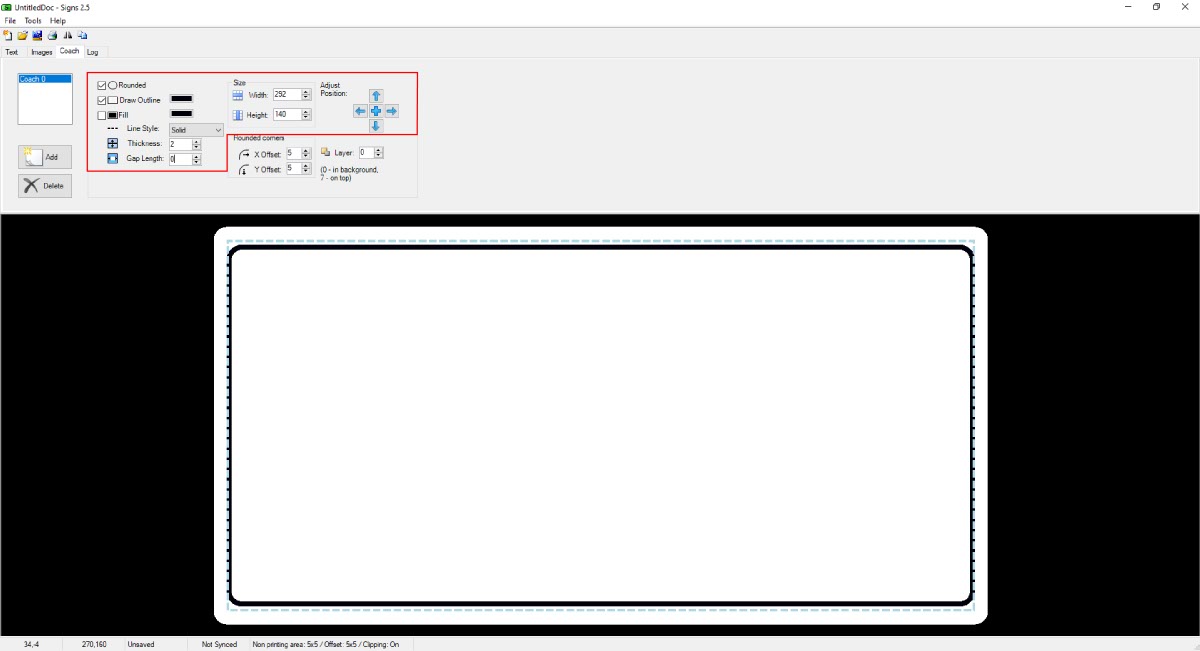
Adjust the Bottom Gap
Set the bottom gap or remove it
To alter the Gap Length simply change the value from the default maximum of 178mm. If you want to remove it altogether just set the value to 0, as seen in the picture above. This will close the gap and turn the coach line into a box.
Style the Coach Line or Box
These options allow you to set size, colour and corners
Enable rounded corners and alter their ratio
Different colours can be used for the outline and fill
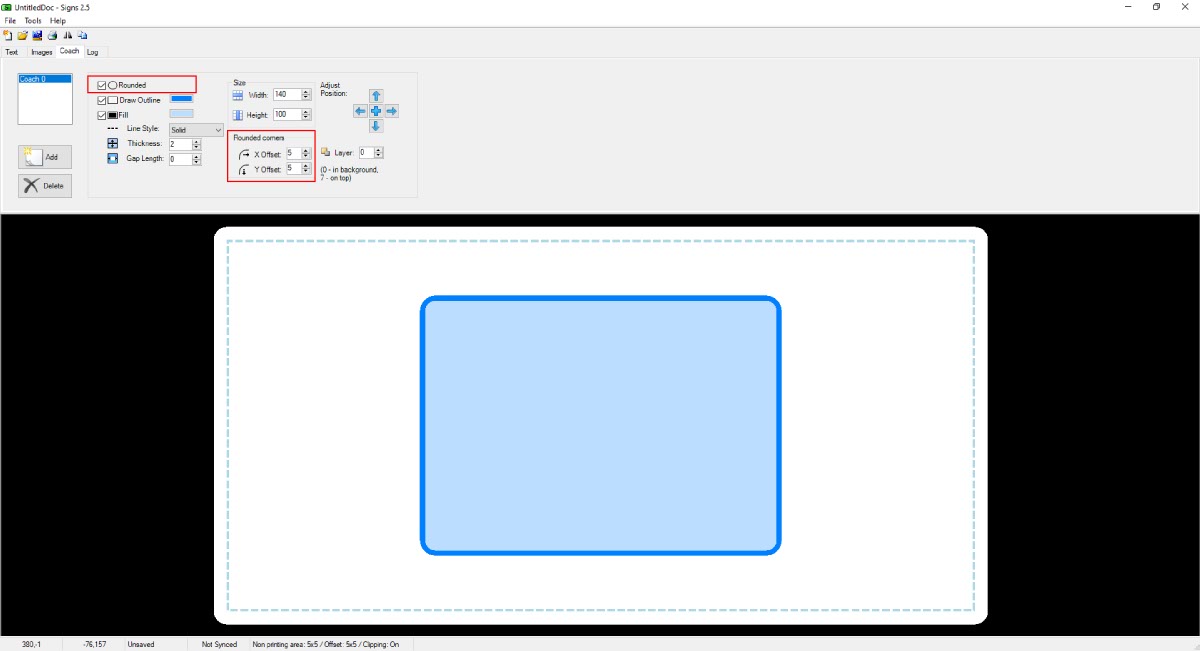
Rounded Corners.
After setting the bottom gap you can move on to style and resize your box. At top of the style options is the checkbox to turn on or off rounded corners. This effects both the outline and inside of the box, as you can see in the picture above. And it is controlled by the Rounded Corner settings, which allows you to pick the X (horizontal) and Y (vertical) values.
Adjusting the rounded corner radius settings will change your boxes shape. To create a circle, ensure your width and heights match, then set the corners to half its height. Or to make a rounded ended shape like a tablet, simply set your radius values to half the boxes height.
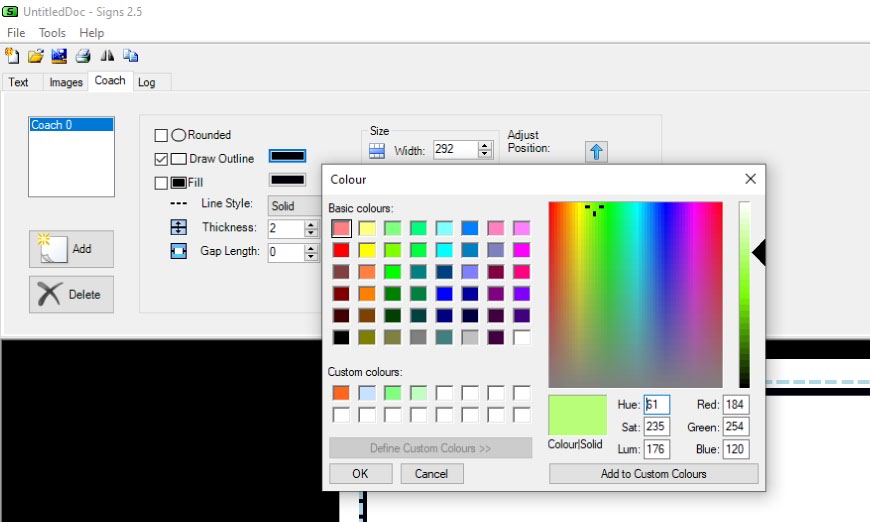
Set An Outline & Fill Colour.
Next up is the Draw Outline checkbox, which allows you to turn the border on or off. Alongside that is the colour control box, simply click it to open up the colour palette tools. Here you can either select one of the existing colours or define your own custom colour. Once you’re happy with your selection, press the OK button to apply it to the outline. Repeat these steps to define a background fill.
Outline Style & Thickness.
Below the colours are the options to change the outline style and its thickness.
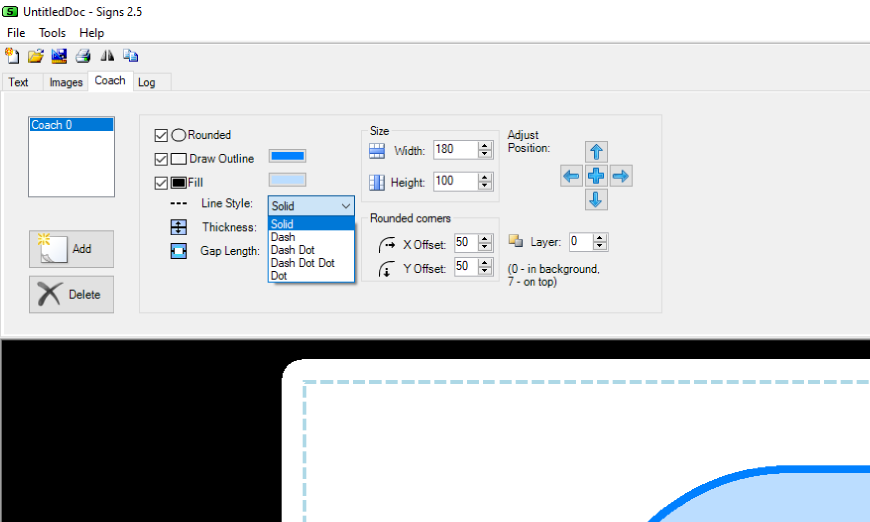
Pick a style for the outline or border
To alter the Line Style, click the drop down and pick another type. The drop down is pre-populated with common line styles, such as solid, dotted or dashed. Simply cycle down the list until you see the one you’re after, and then click to select it. The preview window below will automatically change its appearance to represent the new type. And to adjust the Thickness of the outline, click the increase or decrease arrows to alter its default 2mm size.
Resize & Position
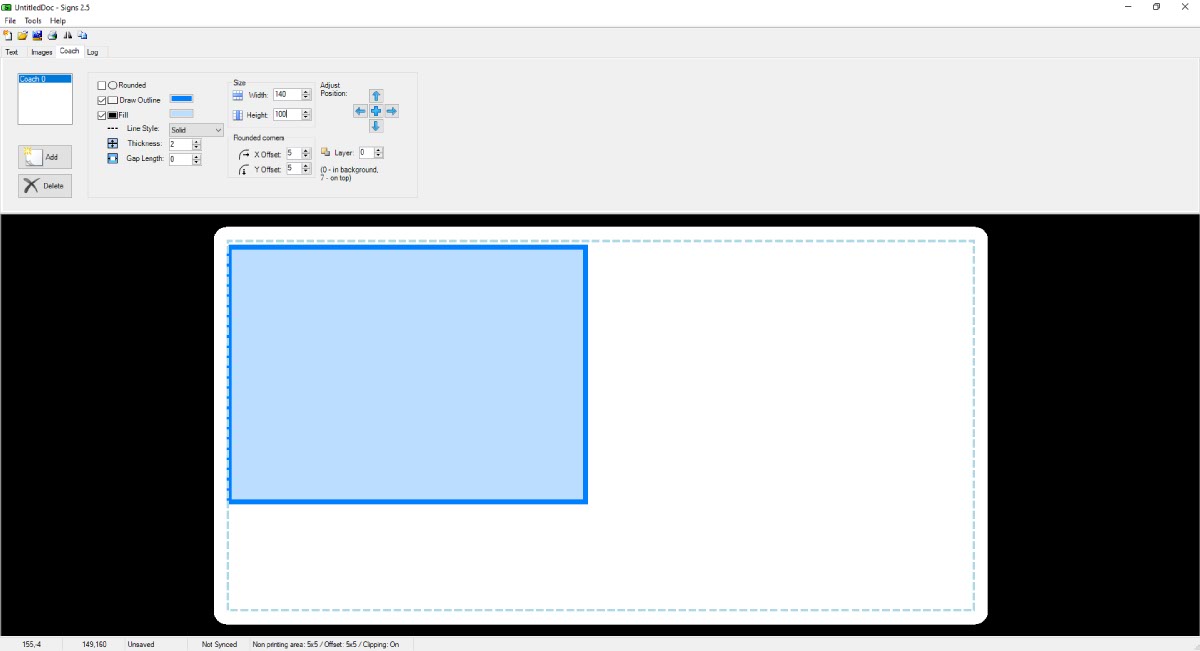
Alter its size and place it into the design
Sooner or later you will want to resize and position your coach line box. While altering its size is easy, simply change its values as seen in the image below. But positioning your element accurately will take you a little bit more practice.
First ensure that you have your target coach line selected, by clicking the active list. Then click into your signs preview window. Your box will move to that position, helping you set the general area first. Now you can use the nudging controls highlighted on the image below to fine tune its position.
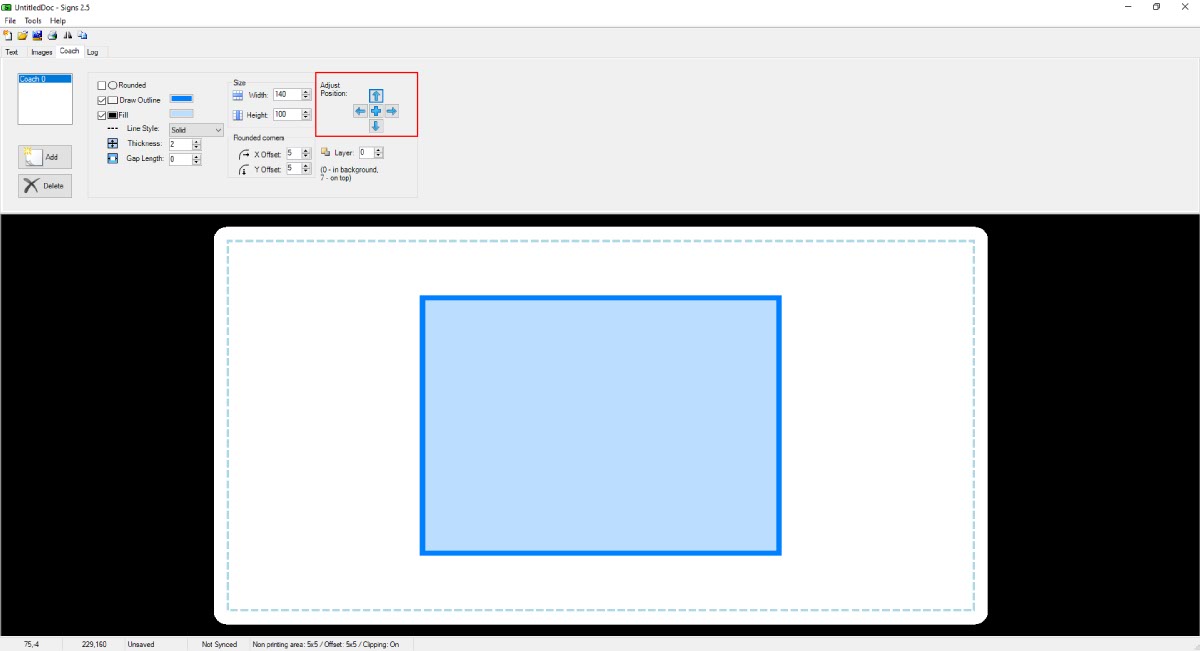
Use the arrows to fine-tune its position
Upon clicking the middle cross, your element will move to the absolute centre of your sign. Whereas clicking the outer arrows will move it in the indicated direction. To save you clicking an arrow multiple times, click it once and then just repeatedly press or hold enter on your keyboard.
Add or Delete Coach Lines
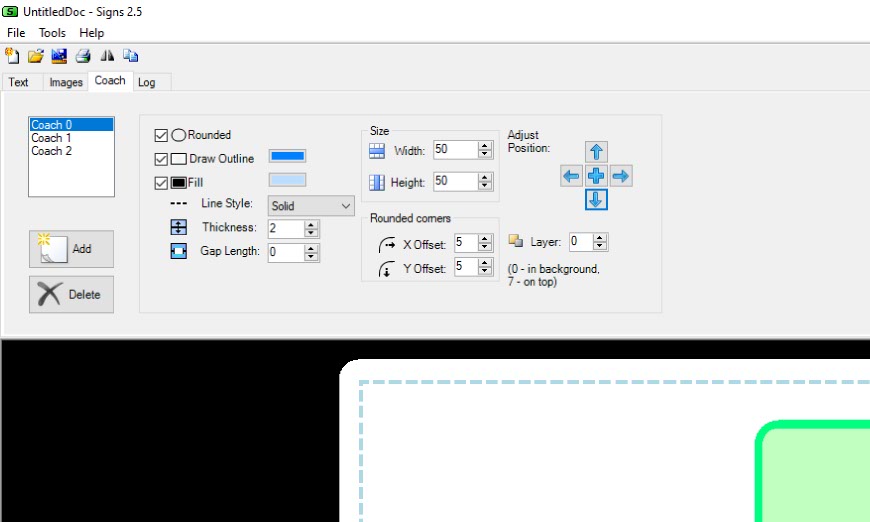
To Add or Delete – select and click a button
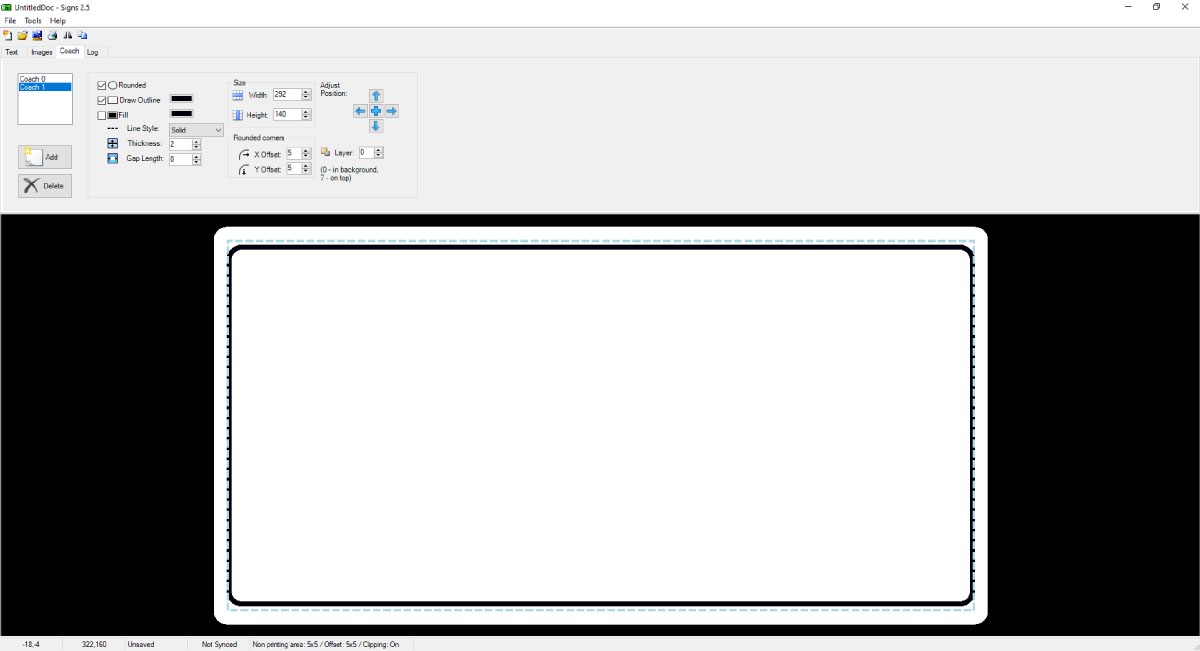
To add more coach lines just click the ADD Button as before. The list will update to show your new coach line, as you can see in the image below. Target each coach line by selecting it, to adjust its settings and styles.
Delete a Coach Line or Box.
If you want to delete a coach line, simply select it from the list and click the Delete Button. Be aware there’s no confirmation box, once you click delete its gone from your design.
Layering Coach Lines
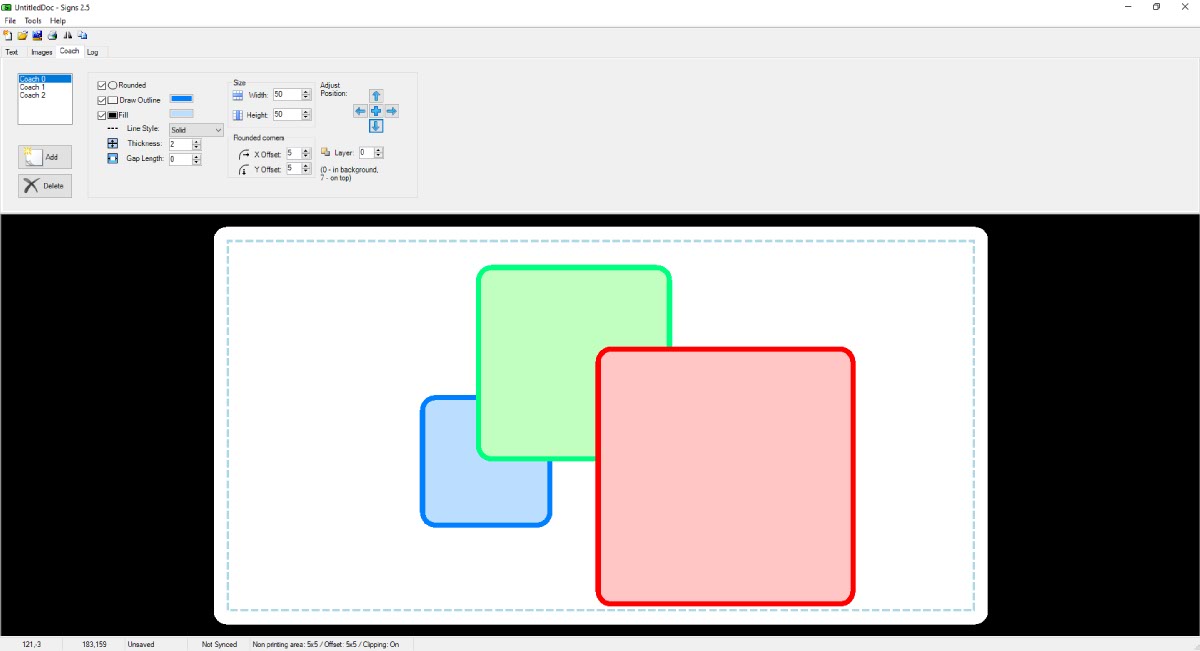
You can layer your elements as well
In addition to inserting coach lines, the order you add them controls their layering as well. By that, we mean which one appears on top or below another. The layering order is simply bottom up, which you can see on the picture below. This means Coach 0 is below Coach 1, which is below Coach 2 and so on.
Right at the bottom of the options you will find the Layer controls. By altering the number from 0 to 7 you can move a coach box above or below another. In fact, not only does this change the stacking of your coach lines but it also effects images and text as well.
This article concludes the basic introduction for the LG Signs Builder Tabs. For details on the RNPS Log we have a set of separate articles for you. Next we will cover how to create Simple Signs and Shaped Plates using LG Signs.