Replace GoDex Ribbon
This knowledge base article shows you how to replace the GoDex ribbon within your Optima trade number plate printer. Below you’ll find the method for fitting our approved ribbons, which are outside wound or ink out ribbons. Instructions that follow assume you are directly facing the front of the machine.
Your printer works by winding a ribbon around its print head, so a fresh area can be used for printing. For this to work, your ribbon is fitted to a cardboard core and then mounted onto plastic holders. It then winds your used ribbon using those holders, until its time to replace it.
Remove Used Ribbon
You’ll first need to remove your used ribbon
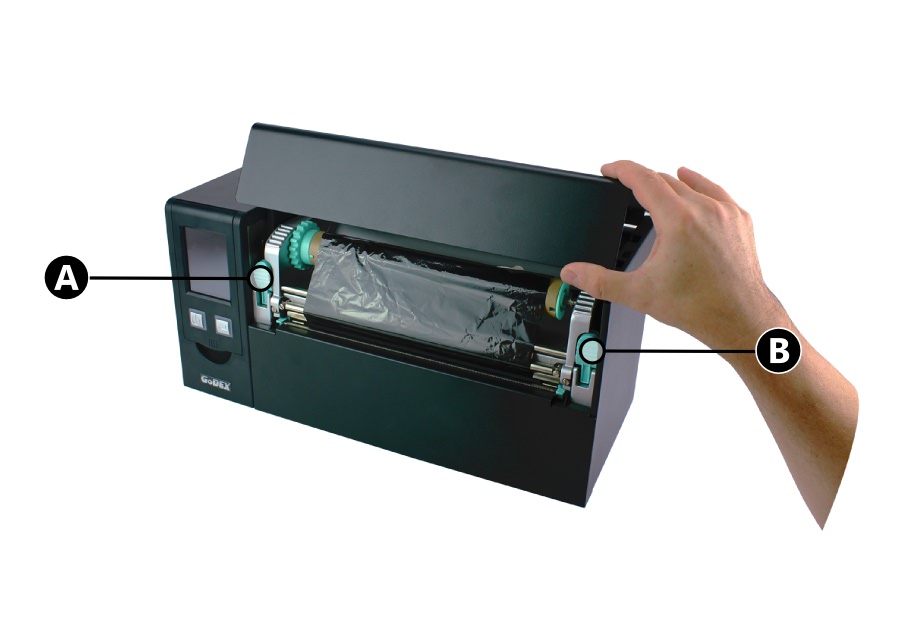
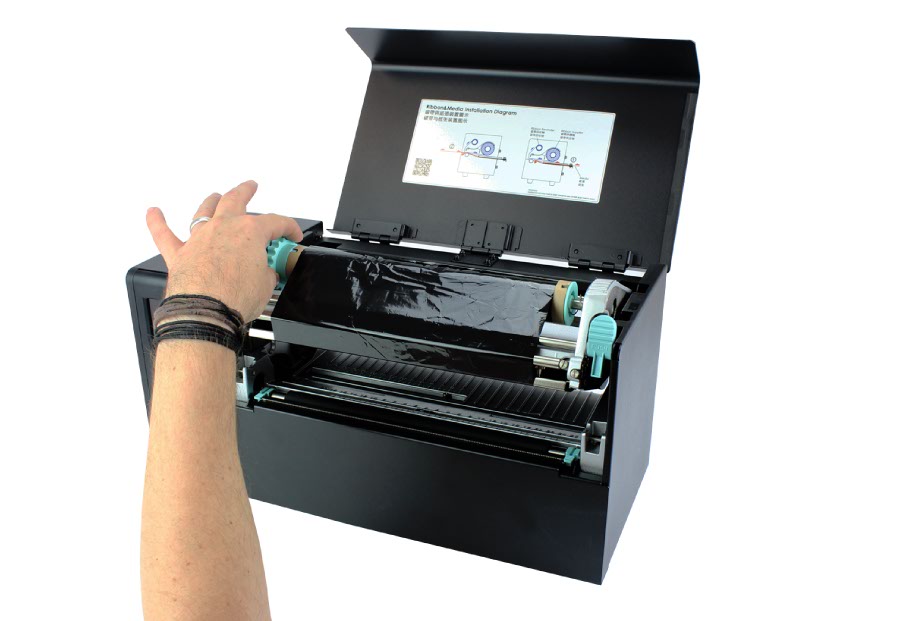
Before you can install a new ribbon, you’ll have to remove the used one. So lift up your printers top cover and raise the print unit by pushing the levers (A+B).
Because the ribbon holders are spring loaded on one side, removing ribbons is similar to replacing batteries. So to remove the ribbon, simply push down the right hand side and lift it off the other side. And repeat this action for both the ribbon and winding core.
Finally unwind the remaining ribbon from its cardboard core, this will become your new winding core.
Fit the Winding Core
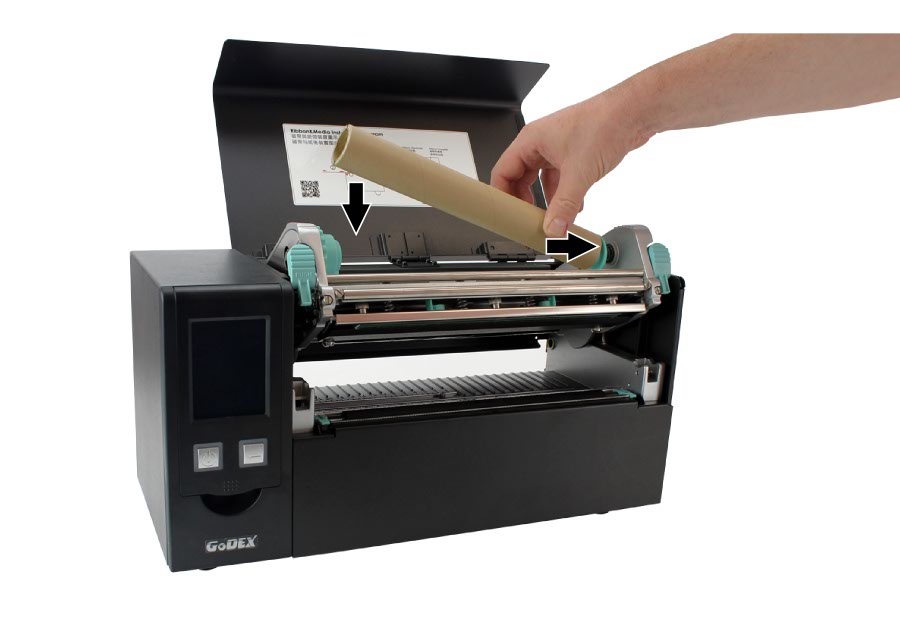
The holders are spring loaded, so push the right hand side in
Next step is to fit your winding core into the top ribbon cradle. If your core has notches, line them up with the right hand holder and push it on. Now just like a battery, push the right side spring down and fit the left side. You may need to rotate it to get your notches lined up.
Replace GoDex Ribbon
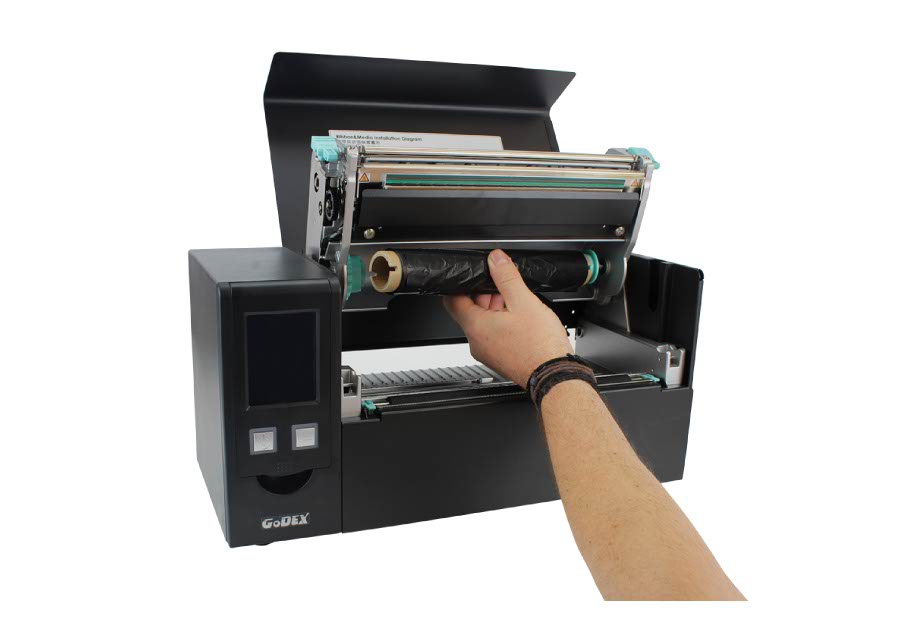
Ribbons are mounted on the bottom holder
For the next step you need to fit your new ribbon into the bottom cradle. Remember to orientate it so the ribbon feeds backwards from the top.
Once again push the right hand side on first, and push down to make fitting the left side easier. As you can see in the image above, you will also need to align its notches.
Attach Ribbon to Winding Core

Pull some ribbon down and around the print head
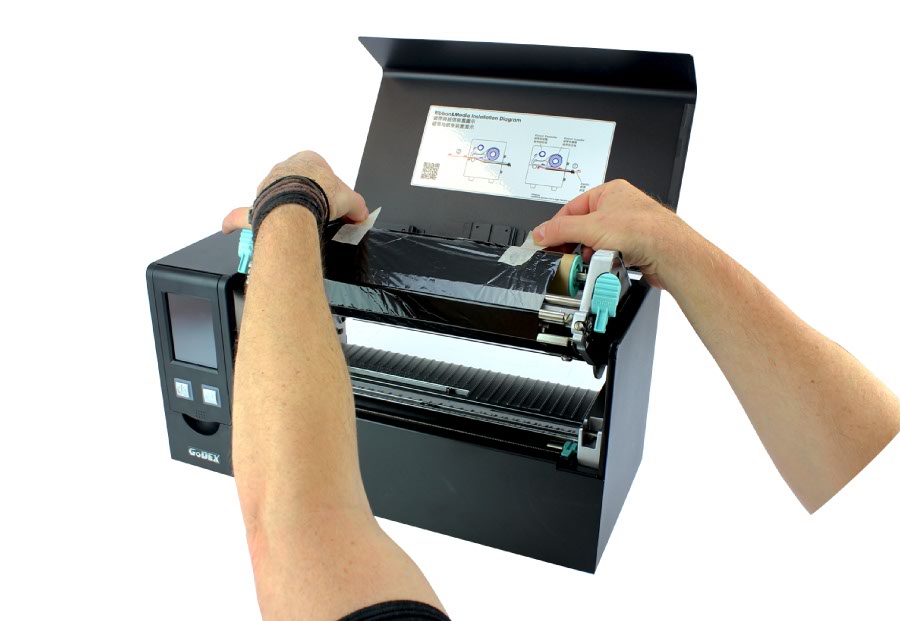
Tape the ribbon to the empty winding core
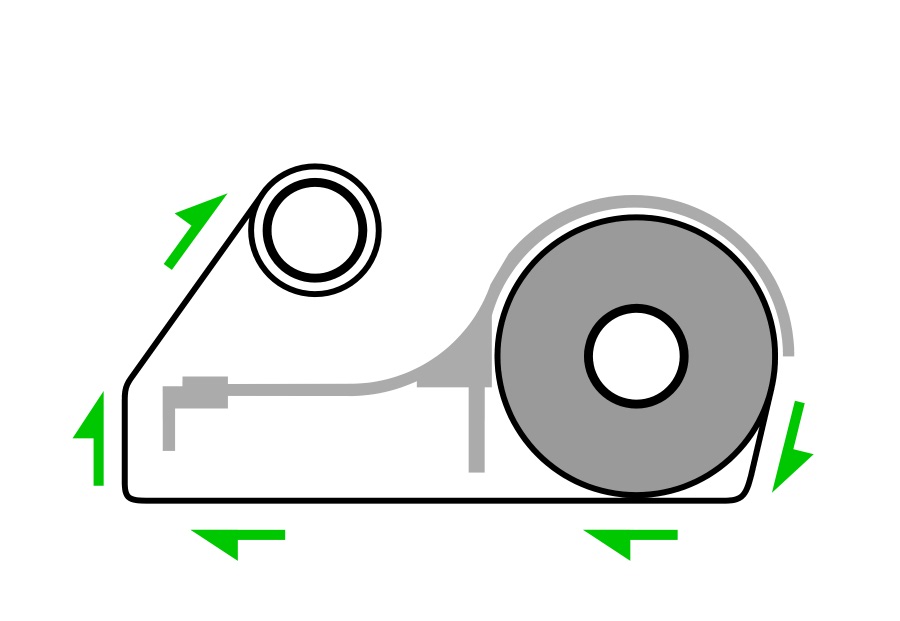
A simple diagram of the ribbon path
The next step is to attach your ribbon to the winding core. So carefully peel the ribbon and pull a length down and under the print unit. Our ribbon came with 2 bits of tape attached, and we’ll use these to stick it onto the winding core.
Simply pull the ribbon around the print head and attach it to your winding core. Try to keep your ribbon crease and wrinkle free, spread it as wide as possible. A quick example of the ribbon path can be seen below. But your ribbon needs to feed back and under the print head and then attach to the winding core.
Remove Wrinkles & Creases
Use the knobs to remove any wrinkles
Finally you may need to remove any wrinkles and creases from the ribbon. Start with your winding core and turn the left cradle up gently to remove any slack. If needed repeat this action with the ribbon core as well. By removing any slack from your ribbon, your wrinkles should be eliminated.
Need Help or a New Ribbon?
For more detailed instructions, try your printers user guide. Or if you need further assistance contact our customer service team for help. Replacing your ribbon is the perfect time to clean your print head. Our online NP-Shop list head cleaning pens and alcohol wipes that are perfect for the job.