This knowledge base article is a quick Film Number Plate Assembly Guide using a roller jig.
You produce a Film Number Plate by laminating a reverse-printed film sheet above a reflective backing plate. Our British Standard certification includes number plates made with this specific plate media combination. So we can guarantee number plates made from them will be road legal, subject to correct use.
Video Guide – Film Number Plate Assembly
Film Number Plate Assembly
When assembling a printed number plate, we recommend using a jig and roller for a professional finish. The jig pins are used to line up media accurately & consistently. And the rollers apply equal pressure across the entire width, helping the adhesive to bond evenly. Below you can see a quick step-by-step guide to Film Number Plate Assembly.
Place a LG EnviroPlate on the Jig

Place the LG EnviroPlate backing on the Jig, use the pins
To start, place your jig in a well lit, clean and warm work area. Use the pins and place your LG EnviroPlate backing on the jig. Ensure it’s positioned flat and straight, reflective facing upwards.
Peel Back & Crease the Adhesive Cover
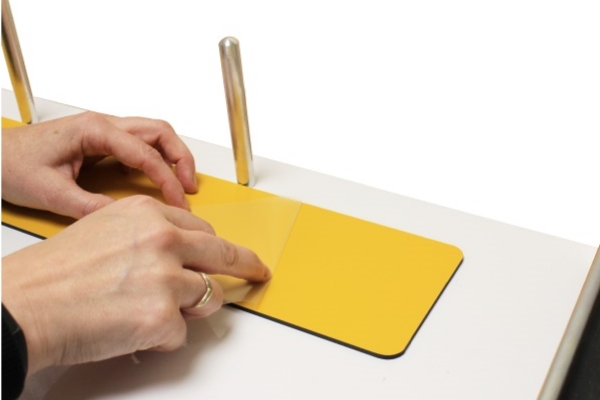
Fold back a few centimetres and crease the adhesive cover
Next, you’ll stick your printed clear film on top of the EnviroPlate. So, fold back a few centimetres of the adhesive cover at the right side of the plate. Create a crease in the cover to stop it from slipping back onto the exposed adhesive.
Do not remove all the adhesive cover at this time, the components need laminating a bit at a time – just like a road sign.
Join Film to the EnviroPlate Backing

Align the Film above and carefully join them together
Now line up the Clear Film, printed side facing down, above the reflective face. Use the pins to ensure the media lines up. Carefully join them together at the exposed adhesive end, by running your finger lightly down the right hand edge.
Move Parts Towards the Rollers
Slide the parts towards the rollers, joined edge first
Next slide both parts towards the rollers, with the joined edge nearest. Ensure you loosely hold the film, to stop it moving about. Stop once your components touch the rollers. Note: Since clear film is lighter than reflective panels, it must be held in place & is not suitable for dropped assembly.
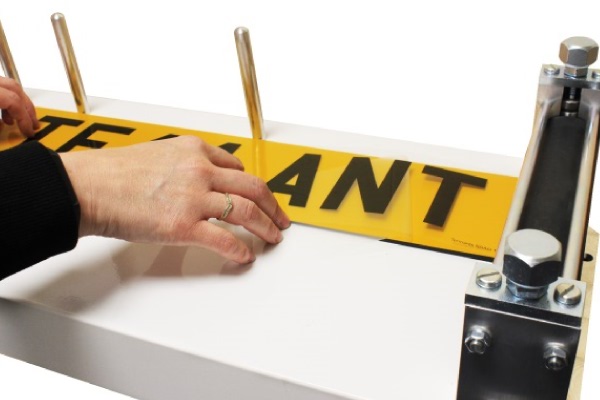
Roll and Bond it All Together

Slowly feed the parts through the rollers using the arm & keeping the film in place
Place your left-hands fingers on top of the media to keep the film flat and slowly wind the roller arm. You want to feed the plate a few centimetres into the rollers. Keeping the film tight, will reduce the chance of any bubbles forming.
Finally, take and keep hold of the folded adhesive cover with your left hand. Slowly wind the roller arm, feeding the plate through while pulling away the adhesive cover. The rollers use pressure to bond the parts together, permanent adhesion may take a few hours to fully cure.
Film Number Plate Specification
We specify our Enviro-Plate or Film Number Plates are made by laminating a printed clear film sheet above a rigid LG EnviroPlate backing. Reverse printing onto clear film, means the print is protected from weathering by being sandwiched between components once assembled. This Film Number Plates article contains more details on our film plate components, its specification & recyclability.
We hope this Film Number Plate Assembly guide provides a quick refresher.