If you make number plates you may wish supply them as Lipped Number Plates, advertising your business. This knowledge base article provides a simple guide on how to do this in LG Plates.
To design a number plate just make your way through our plates builder, setting up each element one-by-one. This article covers one of the extra plate options, Lipped Plates.
Plates Builder – Lipped Number Plates
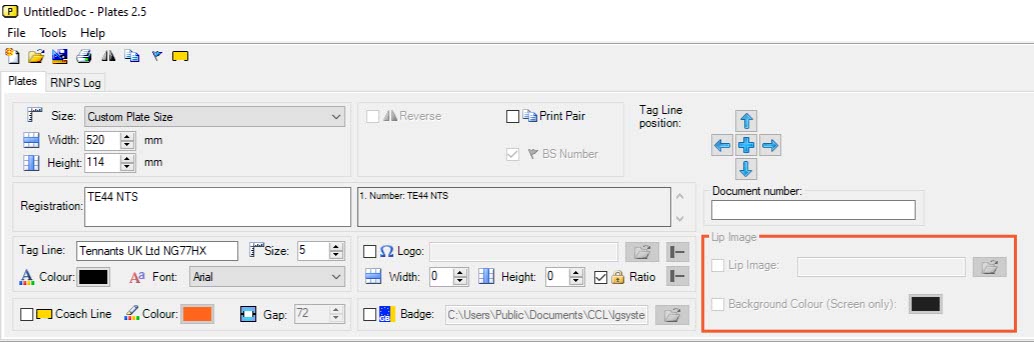
Here’s the lipped plate controls
Lipped Number Plates are an easy way to market your brand using the number plates you supply. And by having it located on an extra part of a number plate – the lip, the strict legal restrictions on layout don’t apply to it. So you can use any font or colour, printer permitting.
Our Plates builder houses all the controls you need to design a lipped plate, highlighted on the image above. You can see it enables you to insert a lip image, which allows more creative designs. But you’ll have to select a compatible plate size first.
Pick a Lipped Plate Size
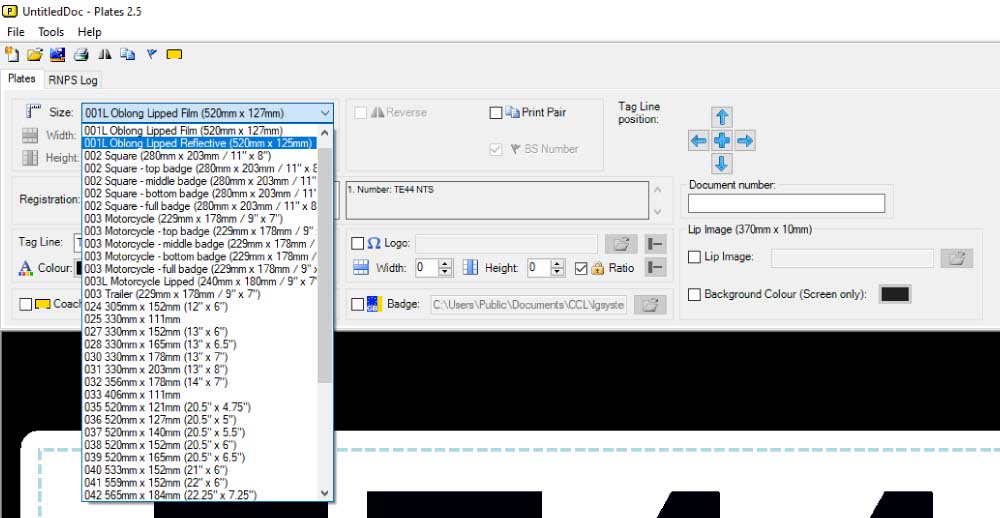
Select a size with a lipped area

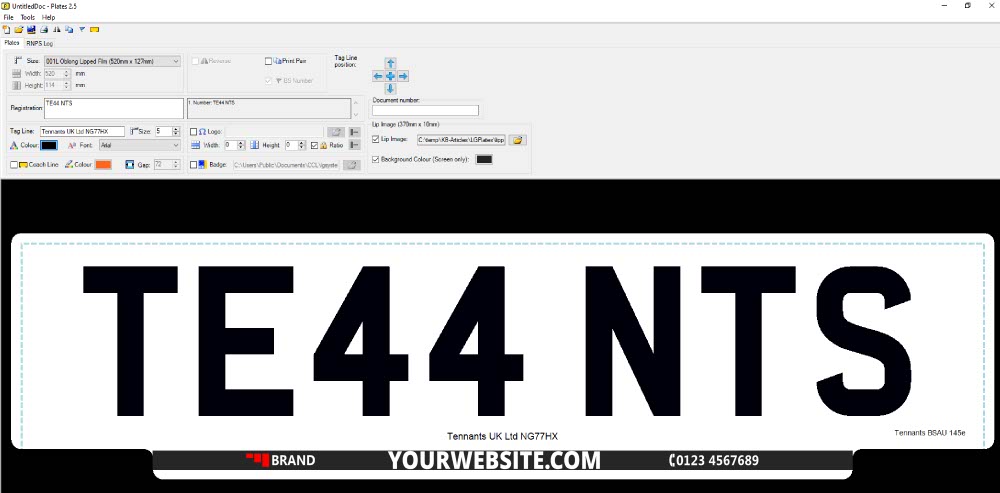
Preview with switch to show the lip
First you need to pick a lipped size, to enable the lip image section. So select either the Lipped Film, Reflective or Motorcycle plate sizes. These are special templates that have specific layouts for making lipped plates. Choose the size which matches the media you will be printing onto, so pick reflective if you are printing onto reflective.
Once a lipped size is selected the preview design window shown below, will change to reflect your choice. The Lip Image options will also now become active, so you can load your lip into the plate design. The lip image options are also active for custom plate sizes.
Insert a Lip Image

Tick to enable the lip and pick your image
Once the options are active, you can insert your individual lip image into the number plate design. Help on designing a lip image can be found in the final section of this article. Remember it has to fit within the printable area for the lip – shown for oblong as 370x10mm below.
Begin by selecting the tick box, and then click the Folder icon to reveal the browse module. Just like the Files Explorer in Windows, you can look at all the drives and devices connected to your PC. So use it to browse and locate your lip image, select it and then click the Open button.
The preview window will adjust to show the image, it may appear a bit pixelated on larger screens. And if you have used white on a transparent background, it can be difficult to see it all.
Background Colour
Use a colour to make it easier to see
To help you view difficult to see images, you can also turn on the Background Colour option. This feature helps you view light coloured or transparent images more easily. But it is only for testing, the background colour will not be printed out.
To activate the background select the tick box, and then click the colour box to reveal the colour palette. By clicking “Define Custom Colours” button, the palette is expanded with a selector and RGB fields. Use these tools to match the colour pre-printed onto your plate components. Select the colour and then press the OK button to apply it to the background.
Once you’re happy with your choice of lip image, you can always deselect the check box to turn the background colour off.
Lip Image Design
When designing your Lip Image start with a 10mm high box, the width will depend on plate size. Our oblong template has room for a 370mm lip and motorcycle a 188mm lip. This is the canvas for your lip design, everything has to fit into it.
Typically a lip will contain the phone number, email or website of the supplier, along with their logo using their brand colours. As you can see in the picture above, the lip image is positioned centrally within the lip. So you can use the full 10mm height of the box. Coming up with a lipped plate design is not difficult, but it might take a few goes before you are happy with the final printed result.
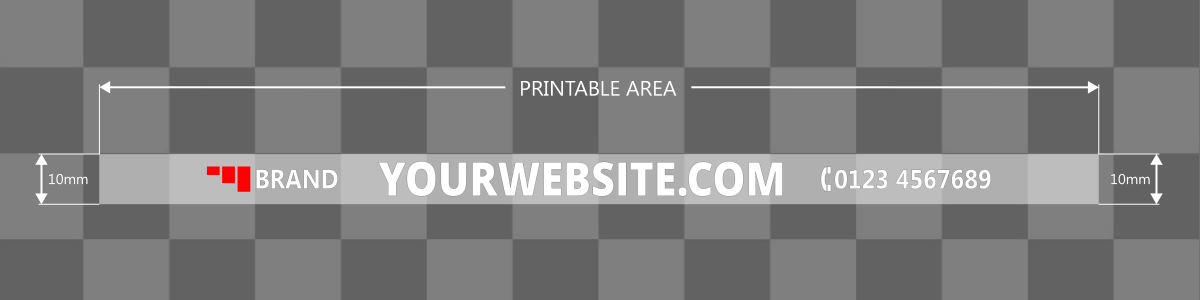
Note: Due to our config settings please Do Not use pure white in your design RGB 255, it will not be printed. Use RGB 250 instead or #FAFAFA a very light grey. Ensure you save it as a PNG image with a transparent background. For a high quality print use a dots or pixels per inch of 150 to 300.