When building a number plate in our software, you may need to alter the design to accommodate Using Pre Printed Media. This knowledge base article provides a simple guide on how to do this in LG Plates.
To design a number plate just make your way through our plates builder, setting up each element one-by-one. This article covers one of the additional options, pre-printed media components.
Plates Builder – Pre-Printed Media
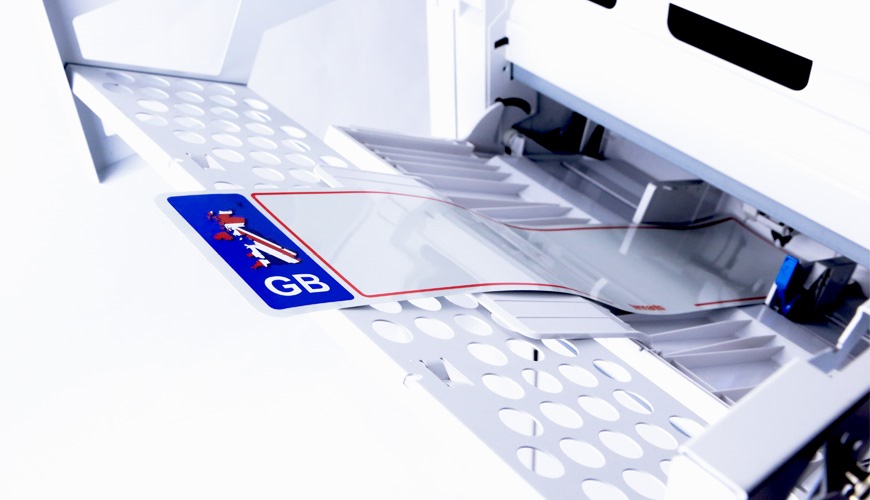
Dry Reflective with pre-printed badge and border
Pre Printed Media is an easy and cost effective way to supply colour number plates. Especially if you’re limited by your printing equipment or production set-up. We offer a comprehensive pre-printed component service. And even under-print in white, to help with colour correction and to avoid the need for badge panels.
Our Plates Builder houses all the options and controls you need to design a number plate. But when using components pre-printed with side badges, coach lines or bottom lines, certain options will need tweaking or not using at all.
Pre Printed Side Badges
The most common type of pre-printed components are those with Side Badges. Regardless of whether you are using media with National Flags or Green ZEV badges, the process is the same. Just follow the steps below.
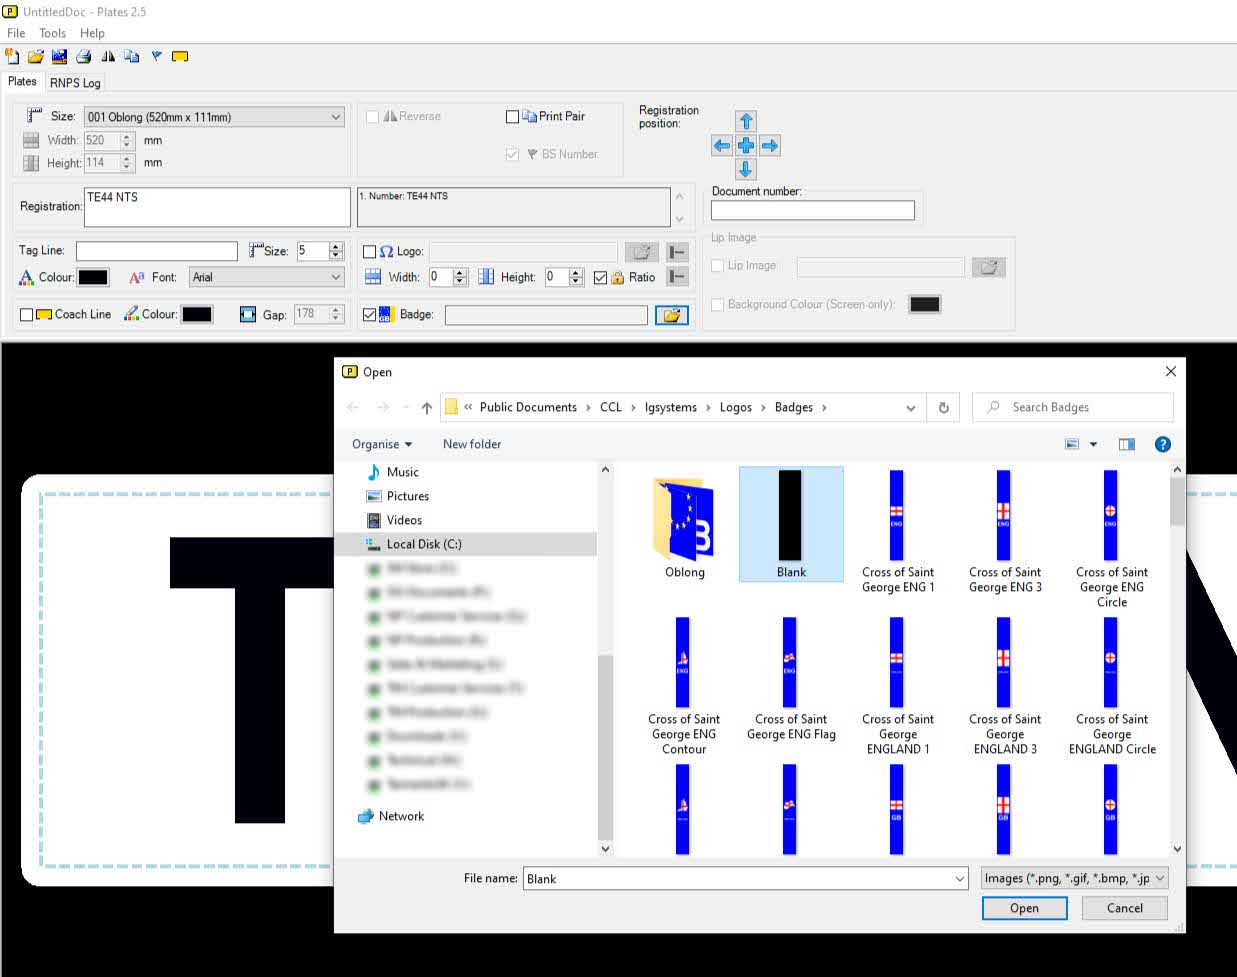
Use the blank image to simulate the printed badge
To make a number plate using media with a pre-printed side badge, you will need to use the Blank badge image. In essence, you need the image to move the registration sideways to account for the pre printed element.
Start by ticking the box within the badge section, and then click the folder to browse. This will open up the browse module for you. Now look inside the badges folder and find the Blank image. Select it and then click the Open button, it should now be placed into the plate design creating a gap. And if a registration number is already present, you will notice it move sideways.
Pre Printed Coach Lines
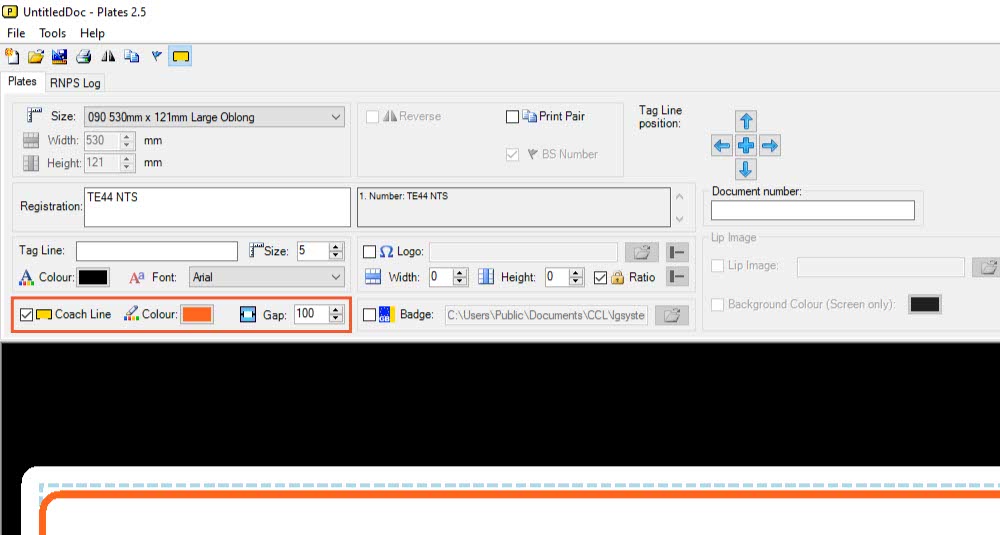
Select a centre gap here
Tweak your bottom line to fit properly
Using a Coach Line or border is a common way to customise a number plate. And to get around colour correction issues, you may choose to get yours pre-printed. But when ordering you will need to specify a centre gap. If you don’t, we will use the maximum gap of 178mm for coach lines.
Using media with pre-printed coach lines is simple, because it doesn’t effect the registration. You only need to adjust your Tag Line or Bottom Line Logo Image to fit within your pre-printed gap. So use the options within the Tag Line or Logo sections, and change its size or alignment to fit.
Pre Printed Bottom Lines
Most suppliers want to issue number plates with their company brand. Which means their fonts and colours. And as long as their name and postcode is readable, this is allowed even under British Standard rules. To get around colour correction issues, you may need to get yours pre-printed. Just make sure it fits into the 178x10mm supplier identifier area as shown below.
![]()
Just like coach lines, using media with a pre-printed bottom line is easy. Put simply, don’t insert one into your design or template in plates. And if using a coach line, ensure your gap is adequate for the pre-printed bottom line.
BS Standards & Regulations
We can explain the restrictions on side badges, coach lines or bottom lines to you, when you order printed components. The BSAU145e standard altered many of the sizes and colours of the plate elements. Or if you want to discover them for yourself try this – What Is a Legal Number Plate article.
If you’re unsure of the size of any pre-printed element, measure it and note down the measurements before you start to design a plate.