CLS621 Overview
Here’s our CLS621 Overview, we use these printers in our Core Systems because they provide a quick and lean answer to printed number plates. This page highlights the important parts and locations on the Citizen CLS621 printer. Refer to this page when troubleshooting or to find out what a part is called or where it’s located.
Video Guide
 CLS621 Printer Overview – YouTube
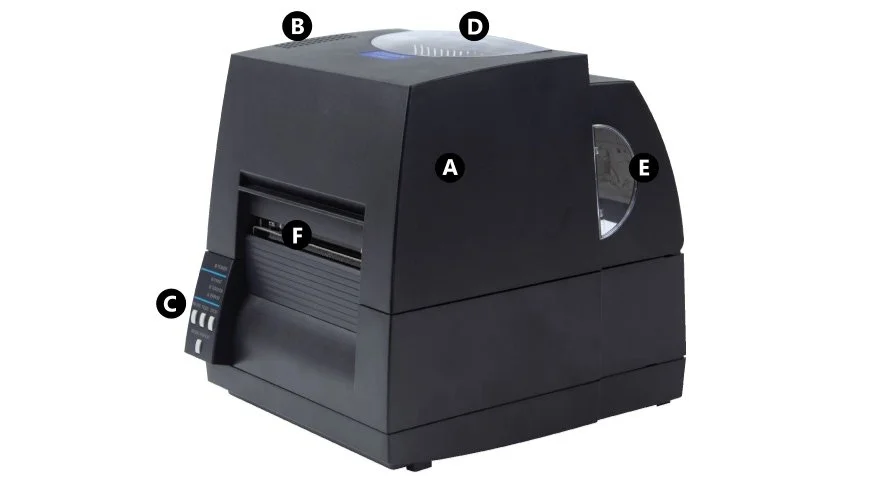
Front View
The front view shows the printers main controls, output and top cover. This is where most interaction with the machine occurs.
- A: Top Cover – Opens vertically to allow access to the inside.
- B: Vent – Discharges built up heat.
- C: Control Panel – Button settings and alerts.
- D: Top Window – View the ribbon status.
- E: Side Window – View the media status.
- F: Output – Printed media output.
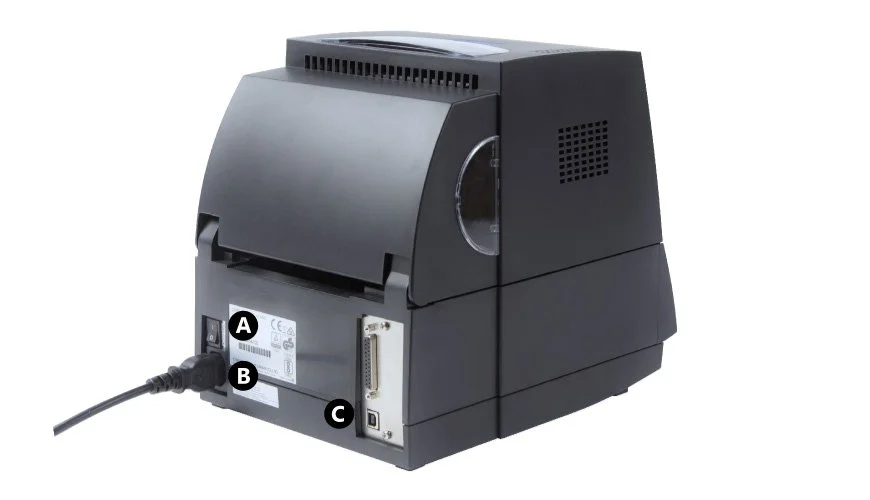
Rear View
The rear view shows the printers mains switch and power points, along with the interface ports.
- A: Power Switch – Toggles mains power on or off.
- B: Power Socket – Mains power cord socket.
- C: USB Port – Used to connect printer to a PC.
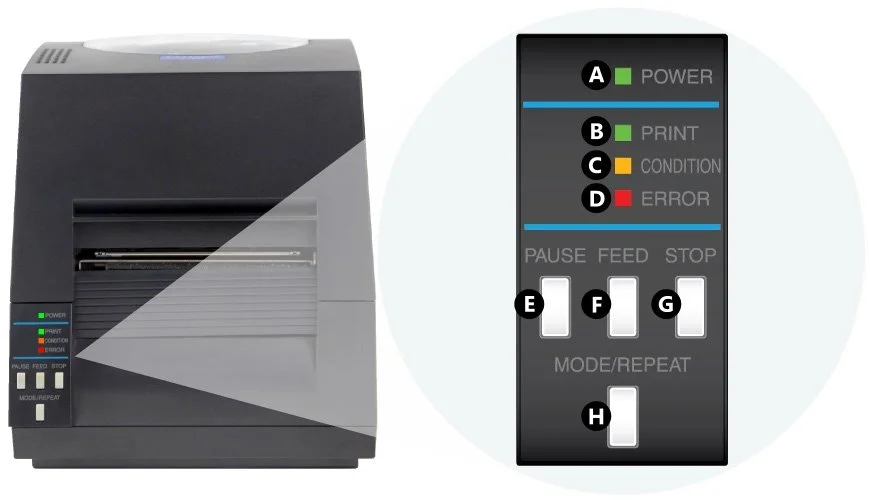
Control Panel
The control panel is where the user interacts with the printer, with options to begin, pause and stop operation.
- A: Power LED – Green when on.
- B: Print LED – Green when ready.
- C: Condition LED – Orange when active.
- D: Error LED – Red for fault.
- E: Pause Key – Pauses current print job.
- F: Feed Key – Moves media to the start position.
- G: Stop Key – Stops printing or cancels the alarm.
- H: Mode/Repeat Key – Exits current mode in menu or reprints the last job.
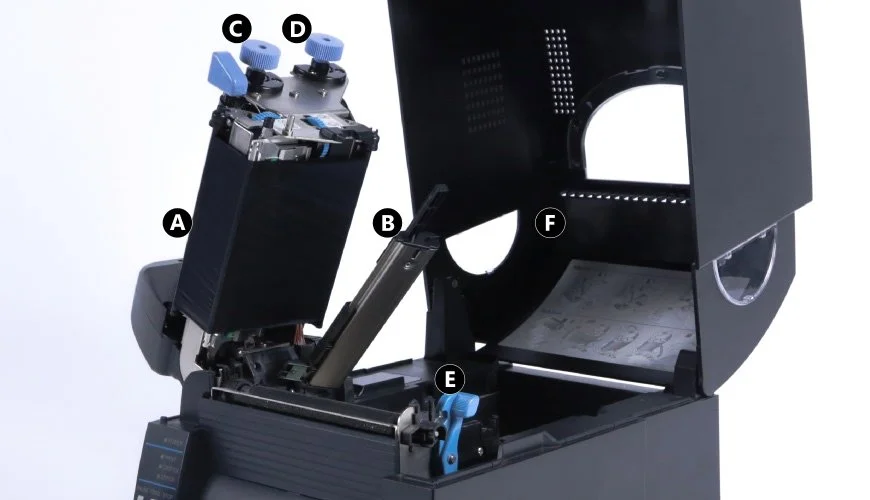
Inside
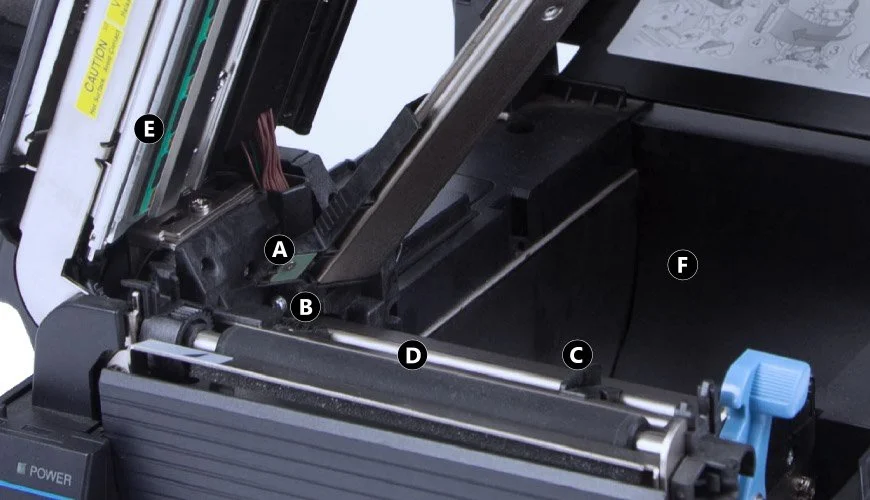
Inside the top cover you’ll find the print unit and media set-up controls.
- A: Print Unit – Ribbon & printing unit.
- B: Sensor Arm – Detects media start position.
- C: Winding Core – Collects the used ribbon.
- D: Ribbon Core – Feeds the ribbon out when printing.
- E: Release Lever – Unlocks the print unit.
- F: Top Cover – Opens up to access interior.
Media Alignment Controls
These media controls help to position, align and pull the media through the printing unit.
- A: Sensor – Detects media start position & perforations.
- B: Media Guide – Helps align media for printing.
- C: Sliding Media Guide – Adjusts to fit the media width.
- D: Platen – Feeds and retracts media through the print unit.
- E: Print Head – Uses heat to apply ink to the component.
- F: Recess – Used for the internal roll feed.
Media Adjustment Controls
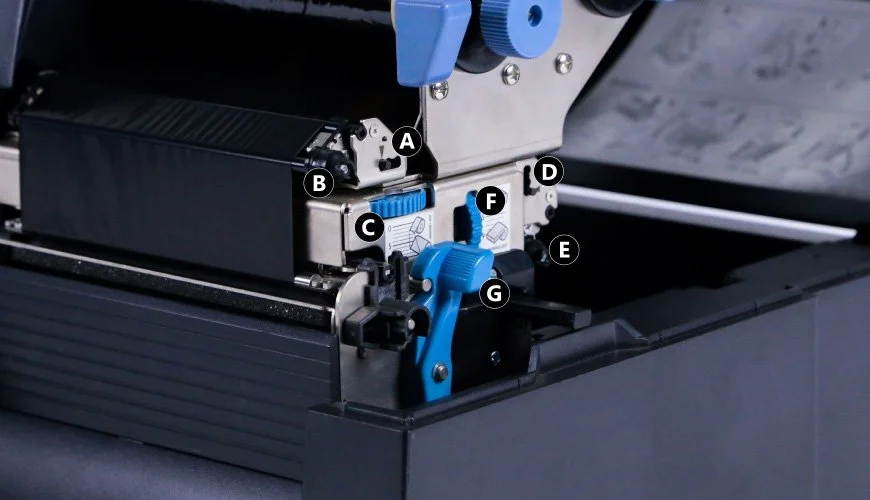
The adjustment controls are where you set the printing pressure, width and ribbon tension.
- A: Front ribbon tension knob (winding) – Adjust to suit ribbon width and if ribbon is wrinkled or slips.
- B: Front ribbon left-right balance knob (winding) – Set to centre position and adjust if ribbon is wrinkled.
- C: Media width dial – Adjust to suit media width, set to 9 for standard oblong.
- D: Back ribbon tension knob (feeding) – Adjust to suit ribbon width or when ribbon wrinkles or slips.
- E: Back ribbon left-right balance knob (feeding) – Set to centre position and adjust if ribbon is wrinkled.
- F: Media thickness dial – Adjust to suit media thickness, set to 4 for our reflective.
- G: Print head lever – Push lever to raise print unit to install media & ribbons.
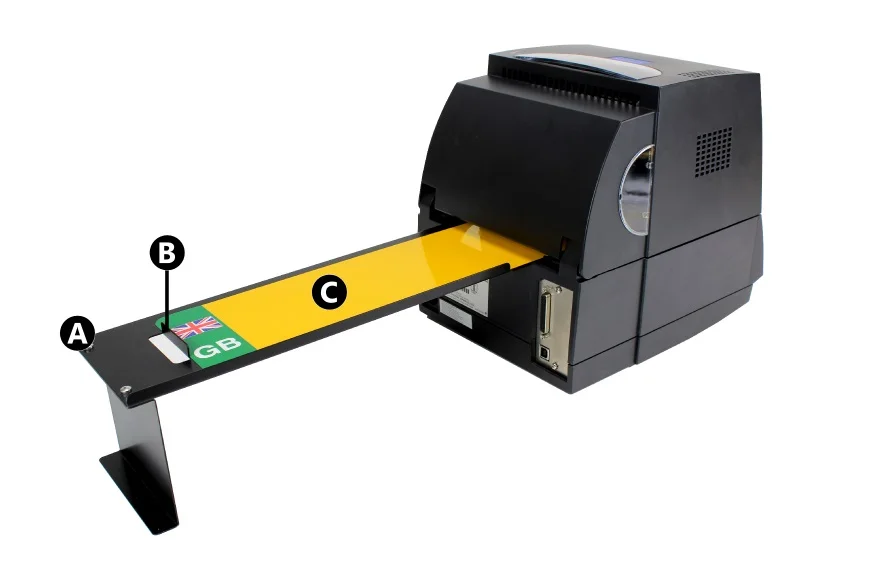
Sheet Fed
- A: Media Tray – Holds reflective sheets before printing.
- B: Raised Media Lip – Helps to align & feed media i nto the printer.
- C: Reflective Sheet – Positioned correctly against the side of the tray and media lip.
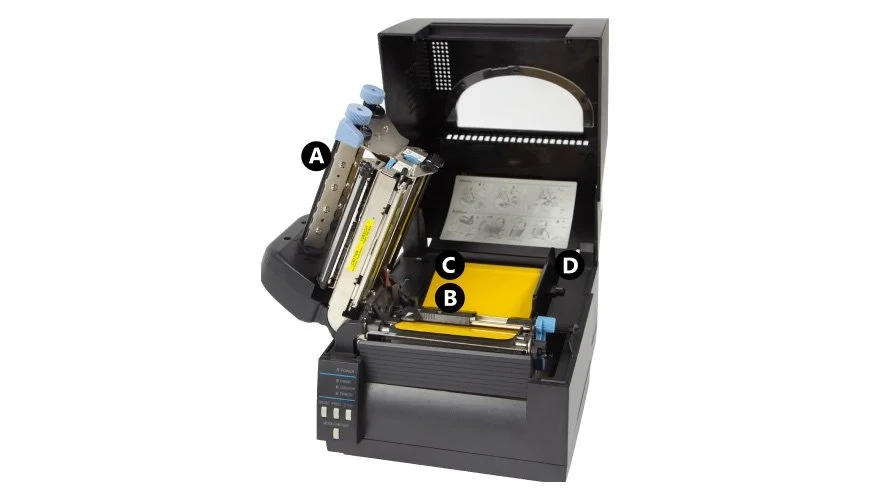
Roll Fed
- A: Print Unit – Holds the ribbon & print head.
- B: Sensor Arm – Detects perforation notches and start marks.
- C: Media Roll – Perforated reflective panels on a roll.
- D: Media Bar – Holds & helps feed media rolls.
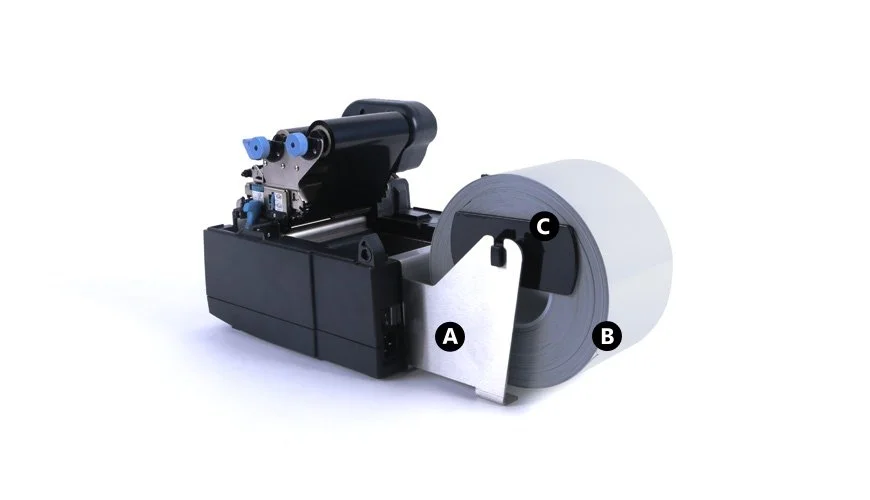
External Roll Fed
- A: Roll Holder – Holds media rolls.
- B: Media Roll – Perforated reflective panels on a roll.
- C: Media Bar – Holds & helps feed the media roll.
Need Help?
This is a basic overview of the Citizen CLS621 Number Plate Printer. Please refer to your user or manufacturers guide for more up-to-date information. If you’ve an account, you can order replacement CLS621 Consumables from our online NP-Shop.
Our knowledge base contains articles with details on replacing this printers ribbon and using media sheets or rolls. Not to mention its required operating conditions and approved printer settings. And has solutions to common number plate print issues and printer errors.

